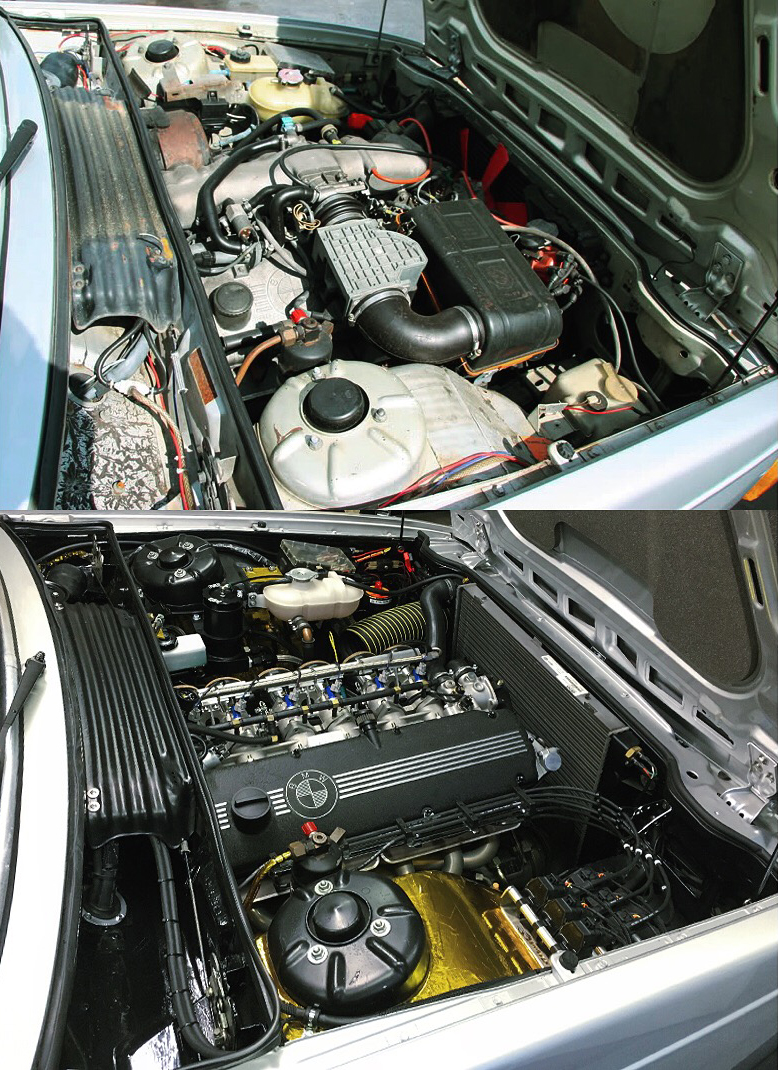
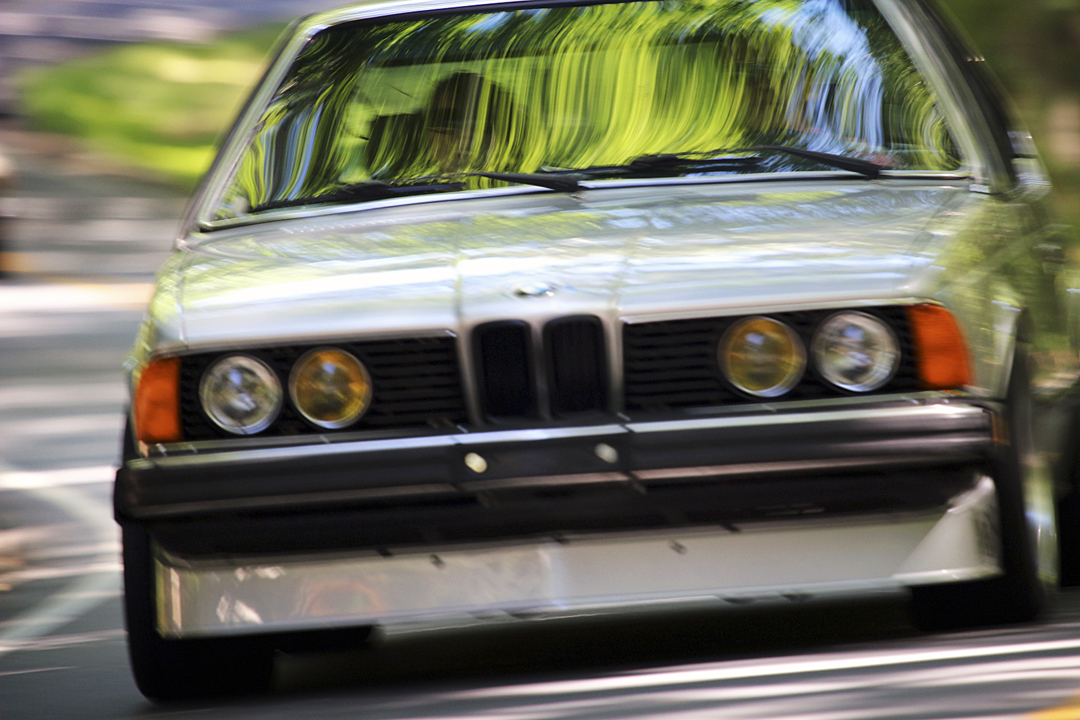
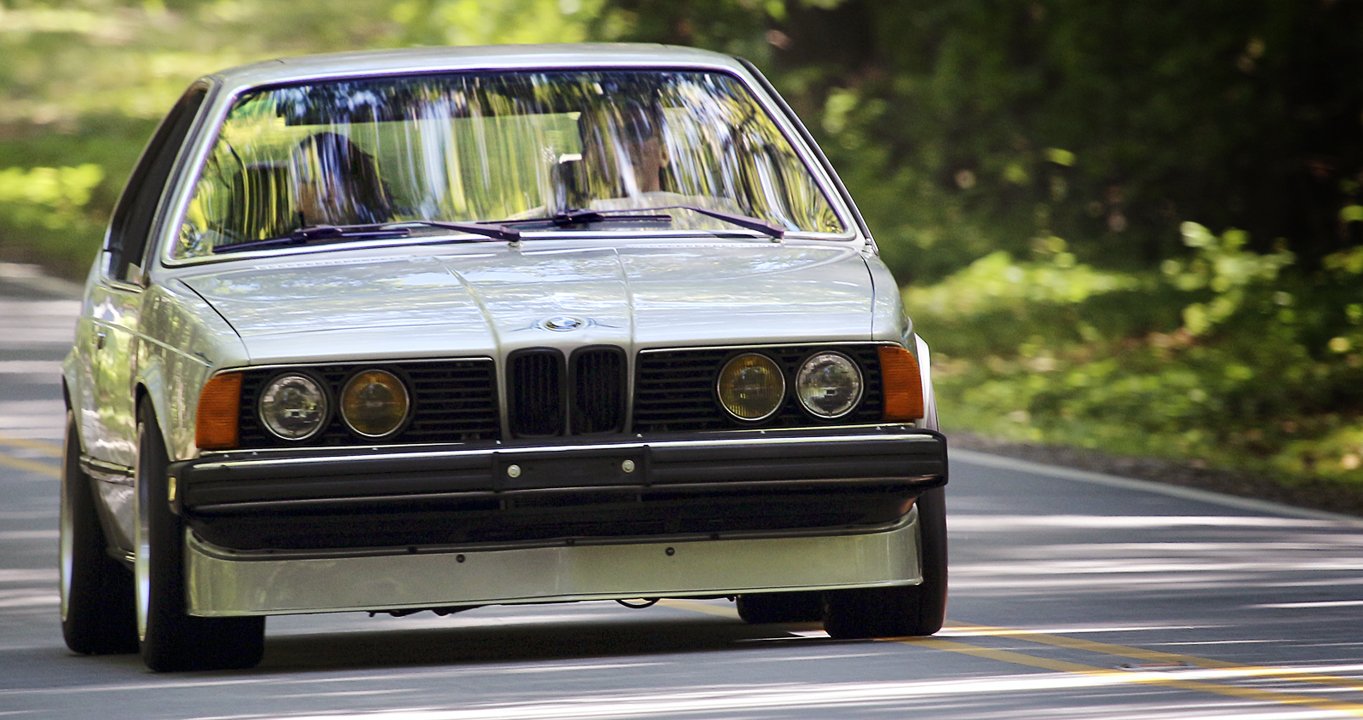
build
studio time
was great to get her under the lights. 
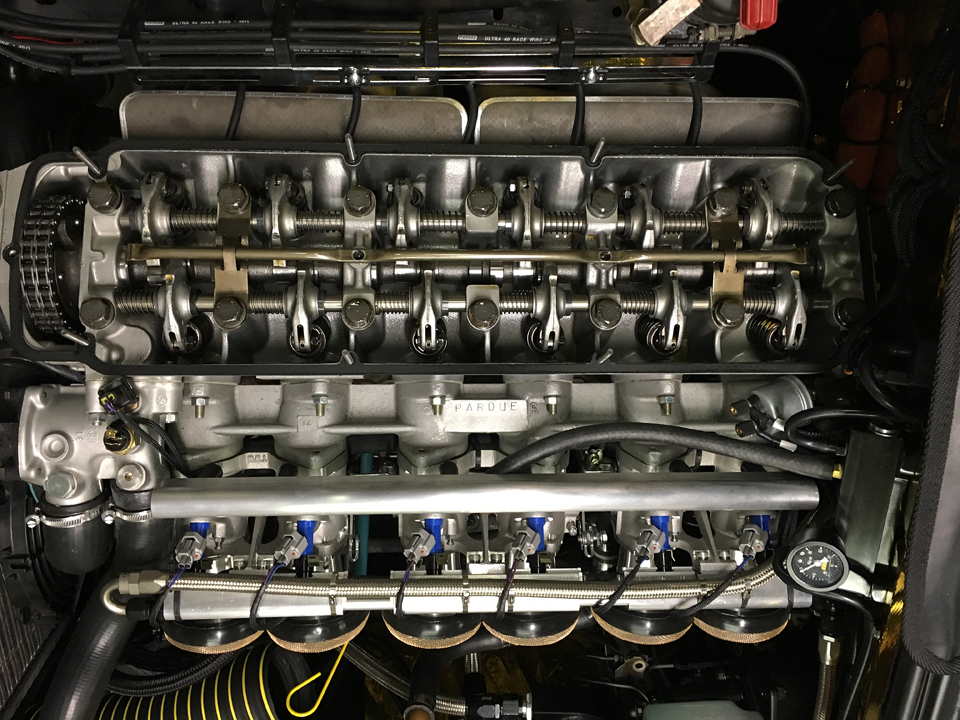
M30 Dual Chambered Oil Sprayer Bar (DCOSB)
A semi common/lesser known issue is the oil bar on the M30 engines. several things can account for it.
- broken loctite, you cant simply retighten and expect it to hold. once the loctite seal is broken it must be replaced. creating leaks and lost pressure.
- over torquing the bolts and pinch the and bar and present leaks and or cracking.
- “the front most cam lobe does not receive enough oil because of the lack of oil pressure in city driving. The long hollow OSB does not develop enough pressure at the front of the bar to oil the front cam lobe. Thus, the front cam lobe wears too quickly causing the M30 motor to run badly”
The DCOSB solves that problem by creating two pressure chambers to feed oil to the cam at higher pressure. a detailed how to can be seen HERE.
This is a simple upgrade to perform that has long lasting benefits
I also purchased a banjo bolt kit from DON. it includes new cross drilled banjo bolts, sealing washers, lockwire, and very detailed instructions!
my photos:


NOS: OE sunroof motor.
Some may not know but the early cars have the sunroof motor in the driver’s rear fender well rather than at the sunroof which makes it unique and difficult to find. I was able to find one, still in the box “1 Stück” !!

Also on the early e12 based chassis there are two sunroof transmissions. below you’ll see the main transmission dismantled and cleaned.


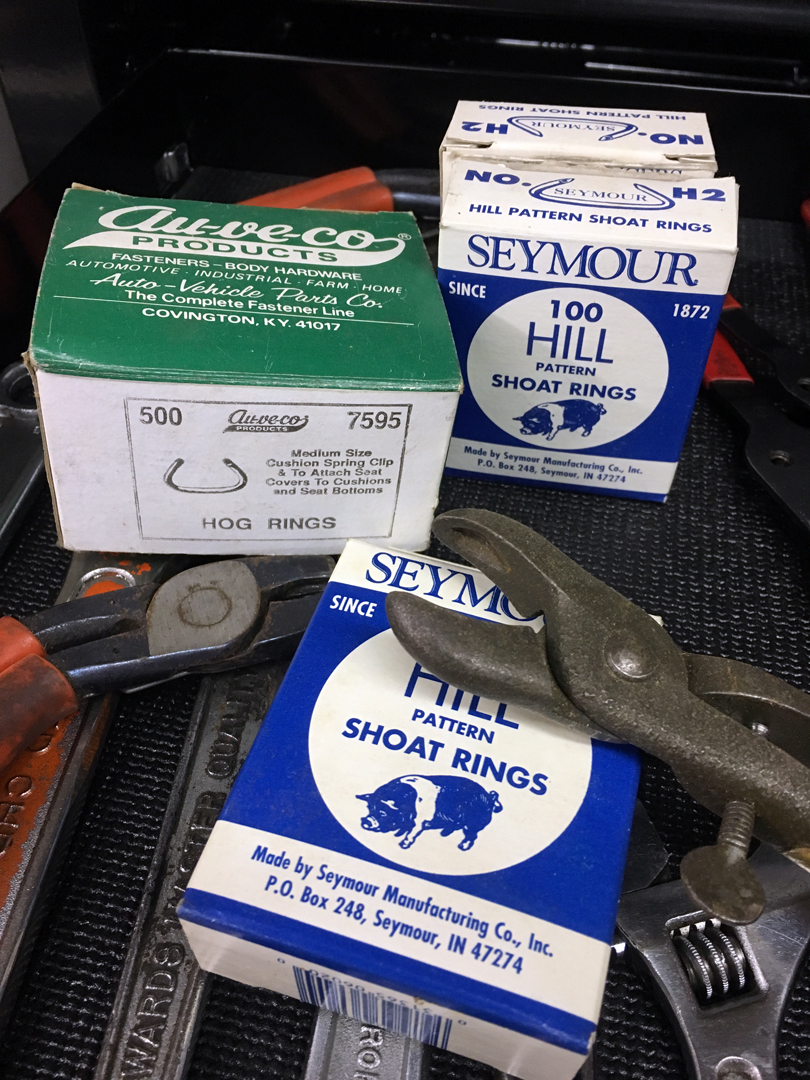
an old upholsterer’s trick
i ran across these while systemically forcing myself to get busy in the garage, my dad used them all the time for coverings and what not. i may start doing some septum piercings if anyone is interested.
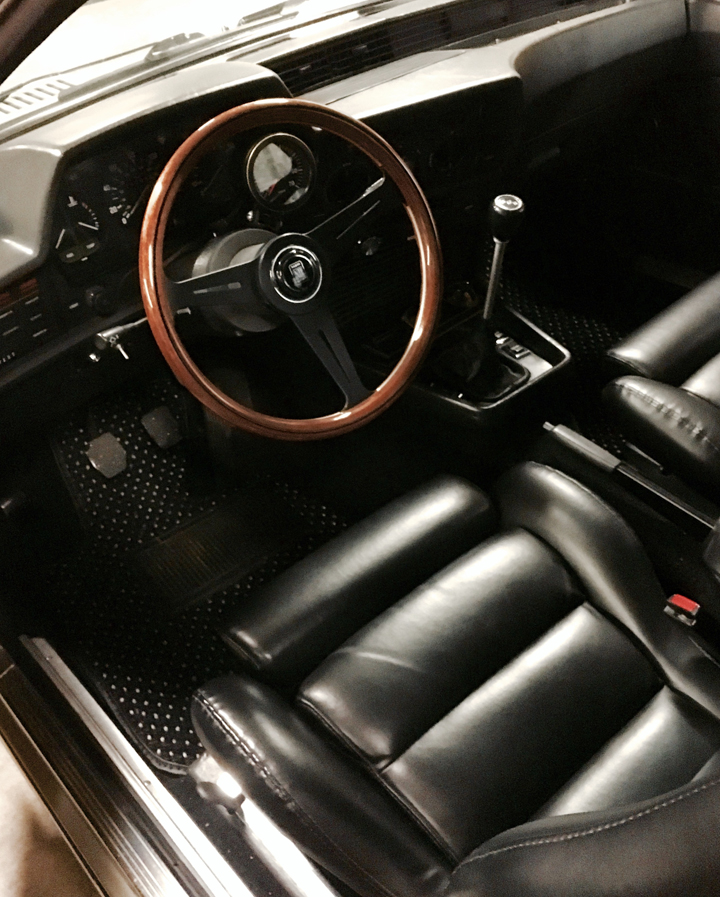
nardi
ive been on a wheel hunt since sept and had some issues but landed on the nardi before the end of the year and it finally arrived .

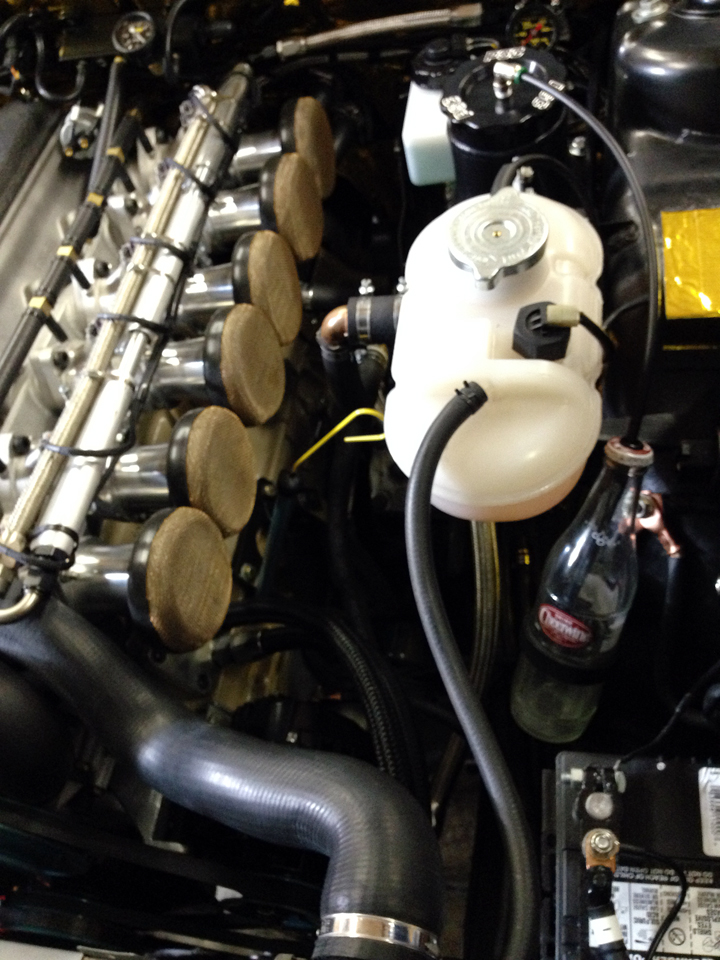
Cheerwine overflow
those that know me remmeber the cheerwine bottle overflow on the Coupe. the throwback.
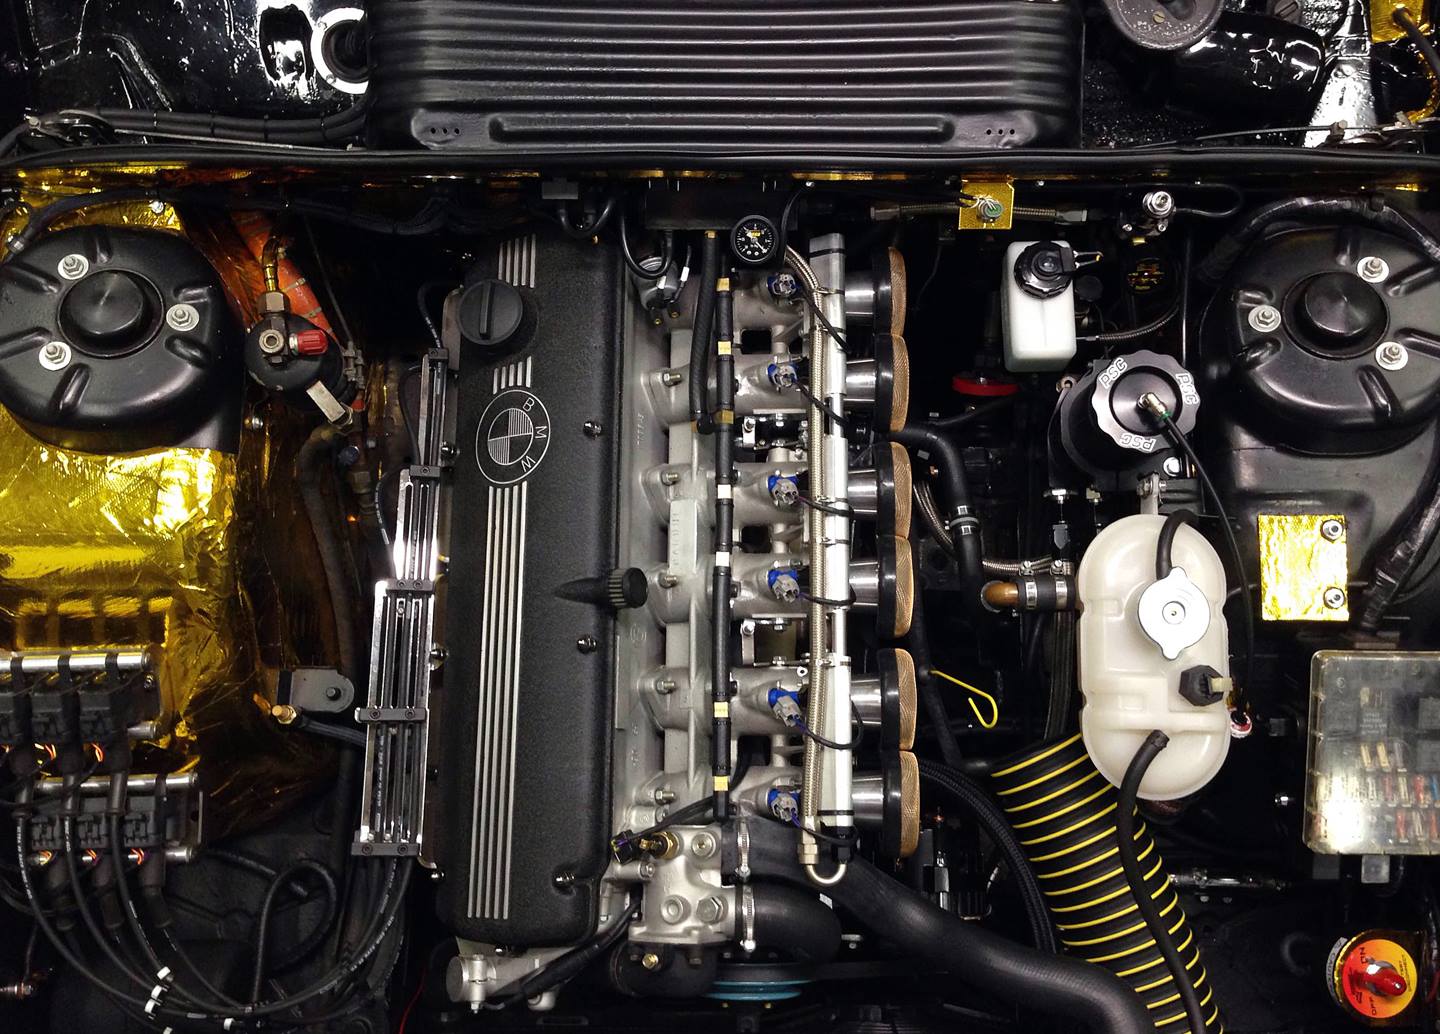
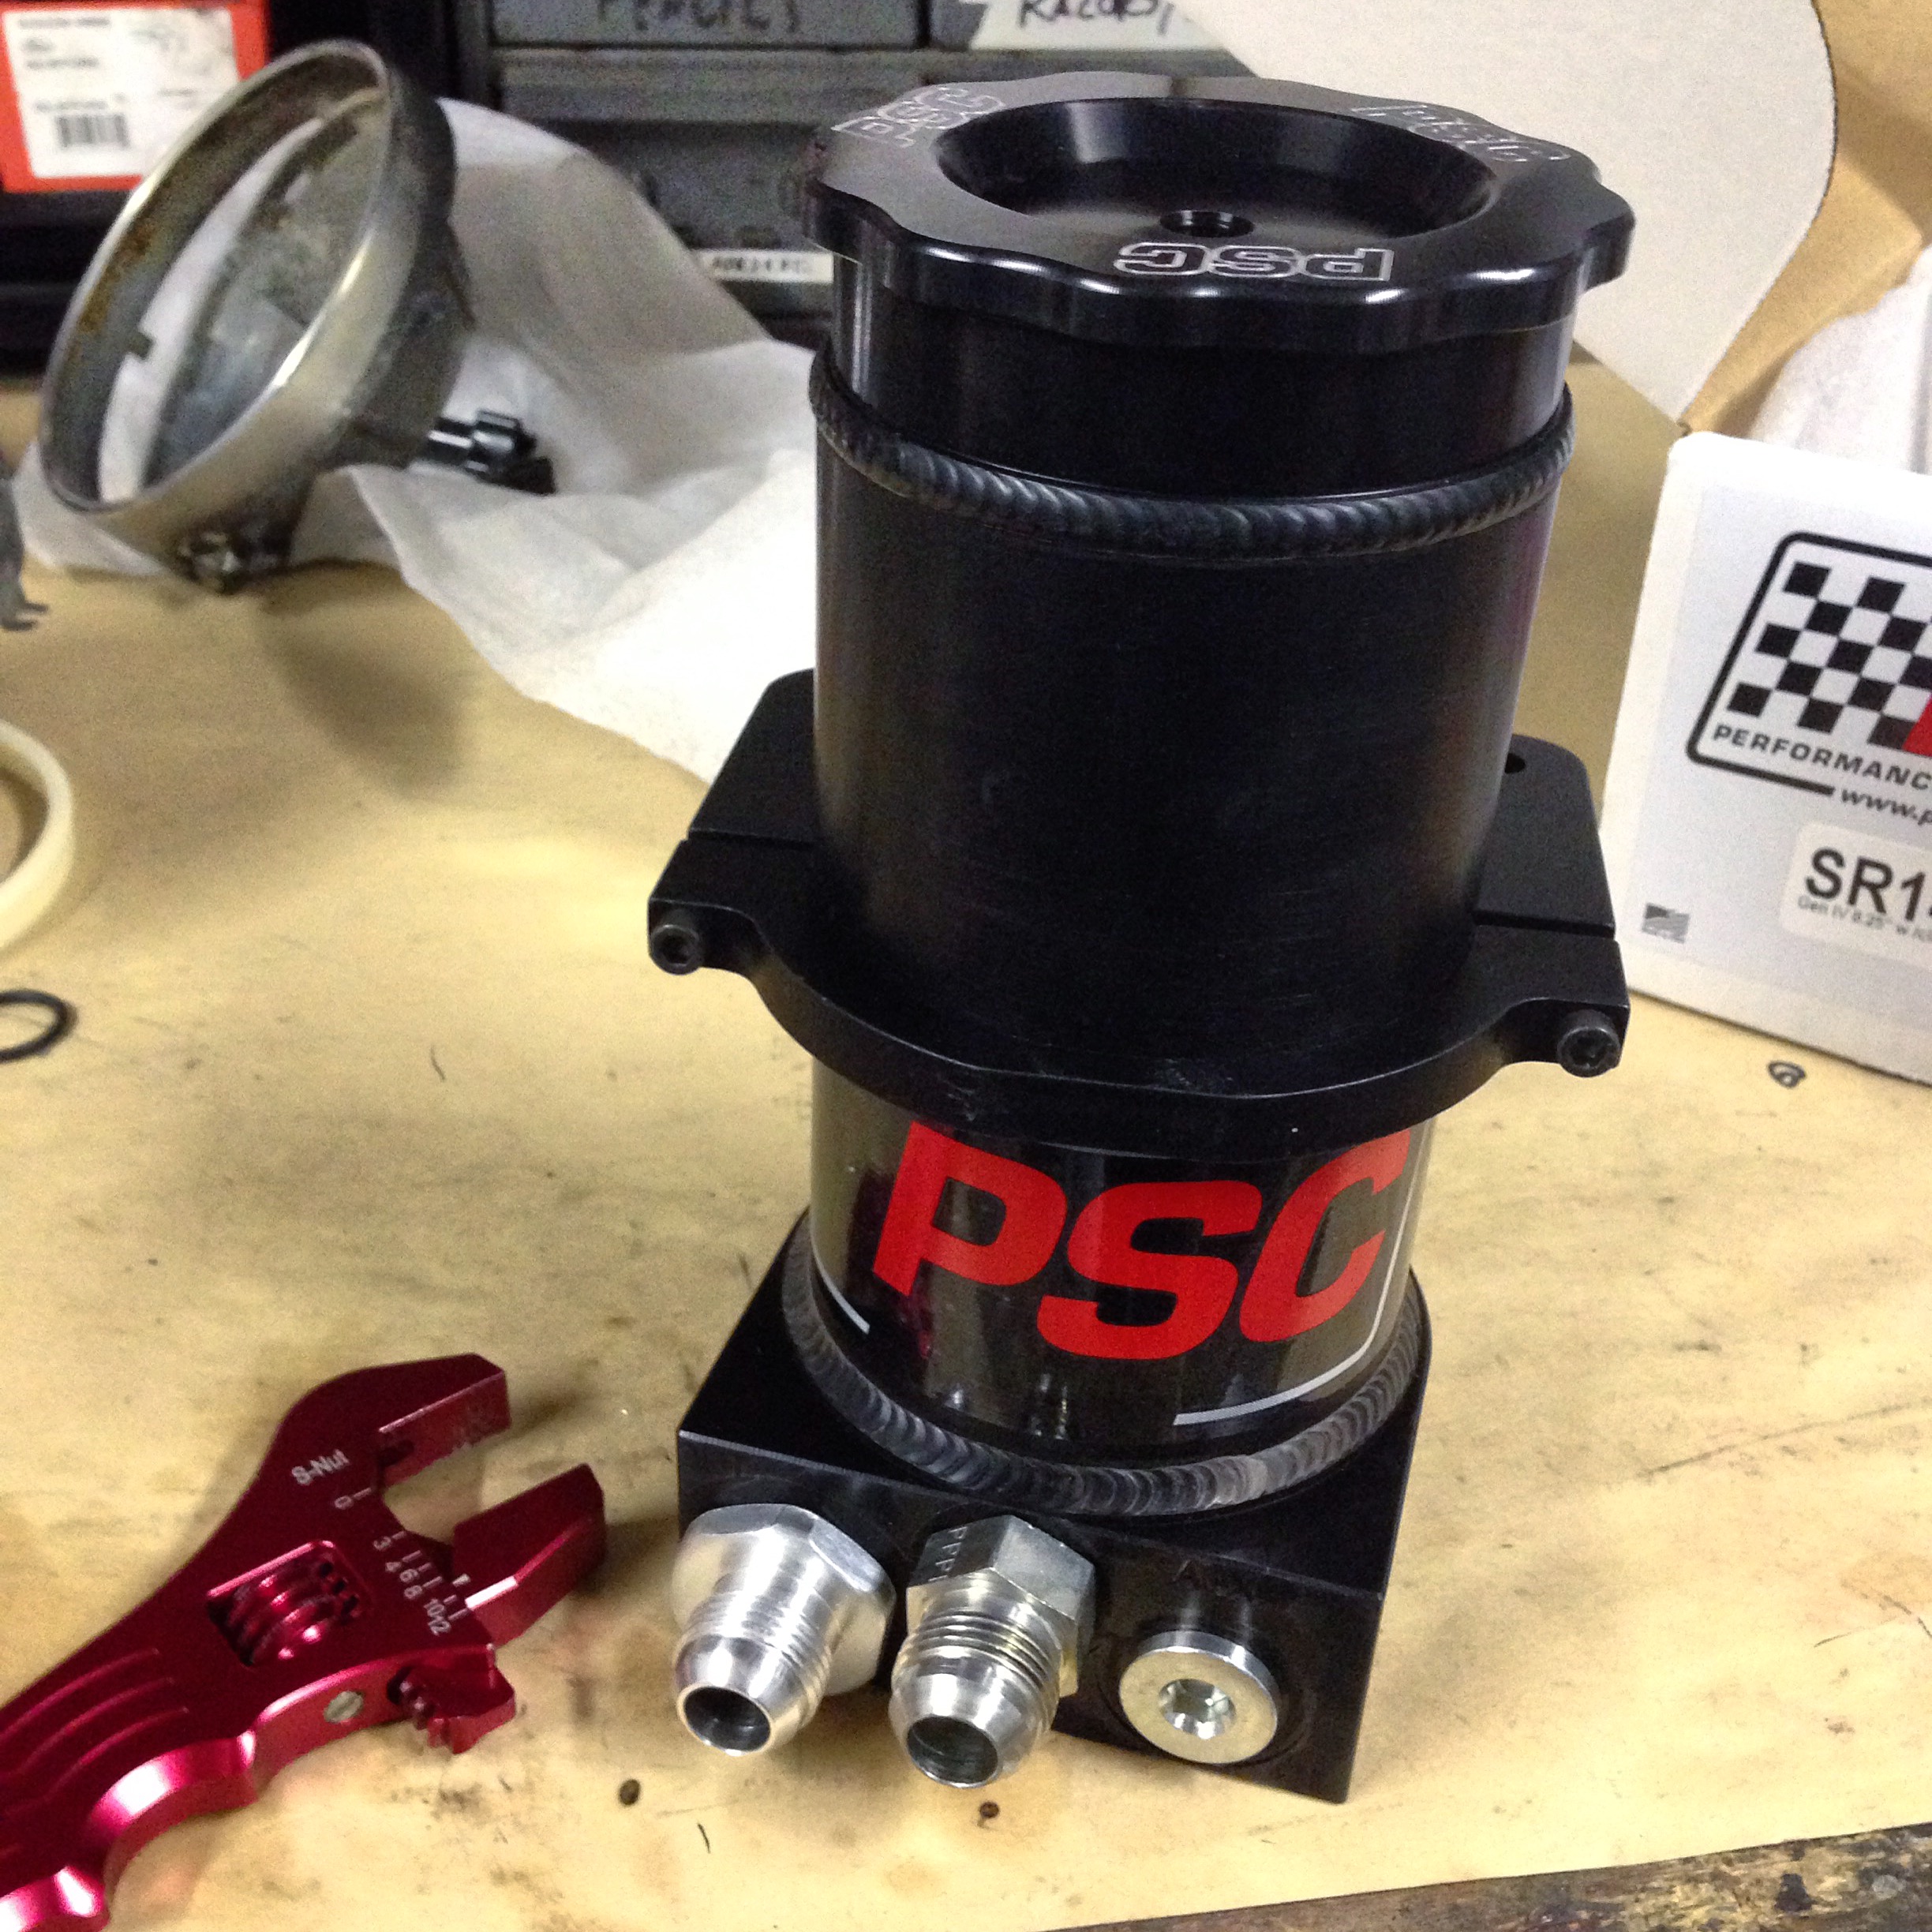
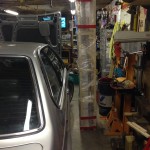
GM power steering
Same story as with the brakes, i’ve spent a tremendous amount of time and money on drivability of the car and the power steering implementation is no exception.
Reminder the Power steering on this car has never “worked” since i bought it. I completely rebuilt the OE pump, Picked up another pump sent it to Lares for rebuild (took months) in the the interim bought two additional steering gearboxes and swapped my factory one for a slightly newer OE one.
While on the Dyno in May at Sneed’s we talked about options and Chris suggested a GM pump. So began the hunt, the GM pumps are readily available, serviceable and CHEAP! the issue is the BMW pumps are NLA there are no more core units & rebuilds don’t make the 100-110 bar that they need to. Commonly called the GM type II which is a variant of the saginaw but uses a remote reservoir.. I ended up with the Allstar performance unit, the proper pulley combination i make the correct pressure and maintain within specs for RPM on the pump.
It took a bit of finagling, with the help of a local machine shop we fabbed up proper brackets. a couple notes:
- I added a slightly longer Conti BMW V belt.
- Fabbed some plumbings fittings and made all new AN lines for the low pressure side.
- Had a custom High Pressure AN hose made.
i wanted to use the factory filtered res but decided against it, because of the sealing issues and crummy filter. I went with the glorious Billet filtered Reservoir from PSC, the PSC unit is larger capacity, vented, has AN fittings, a great filtration element that’s readily available. plus it looks badass!
Below are the pics:


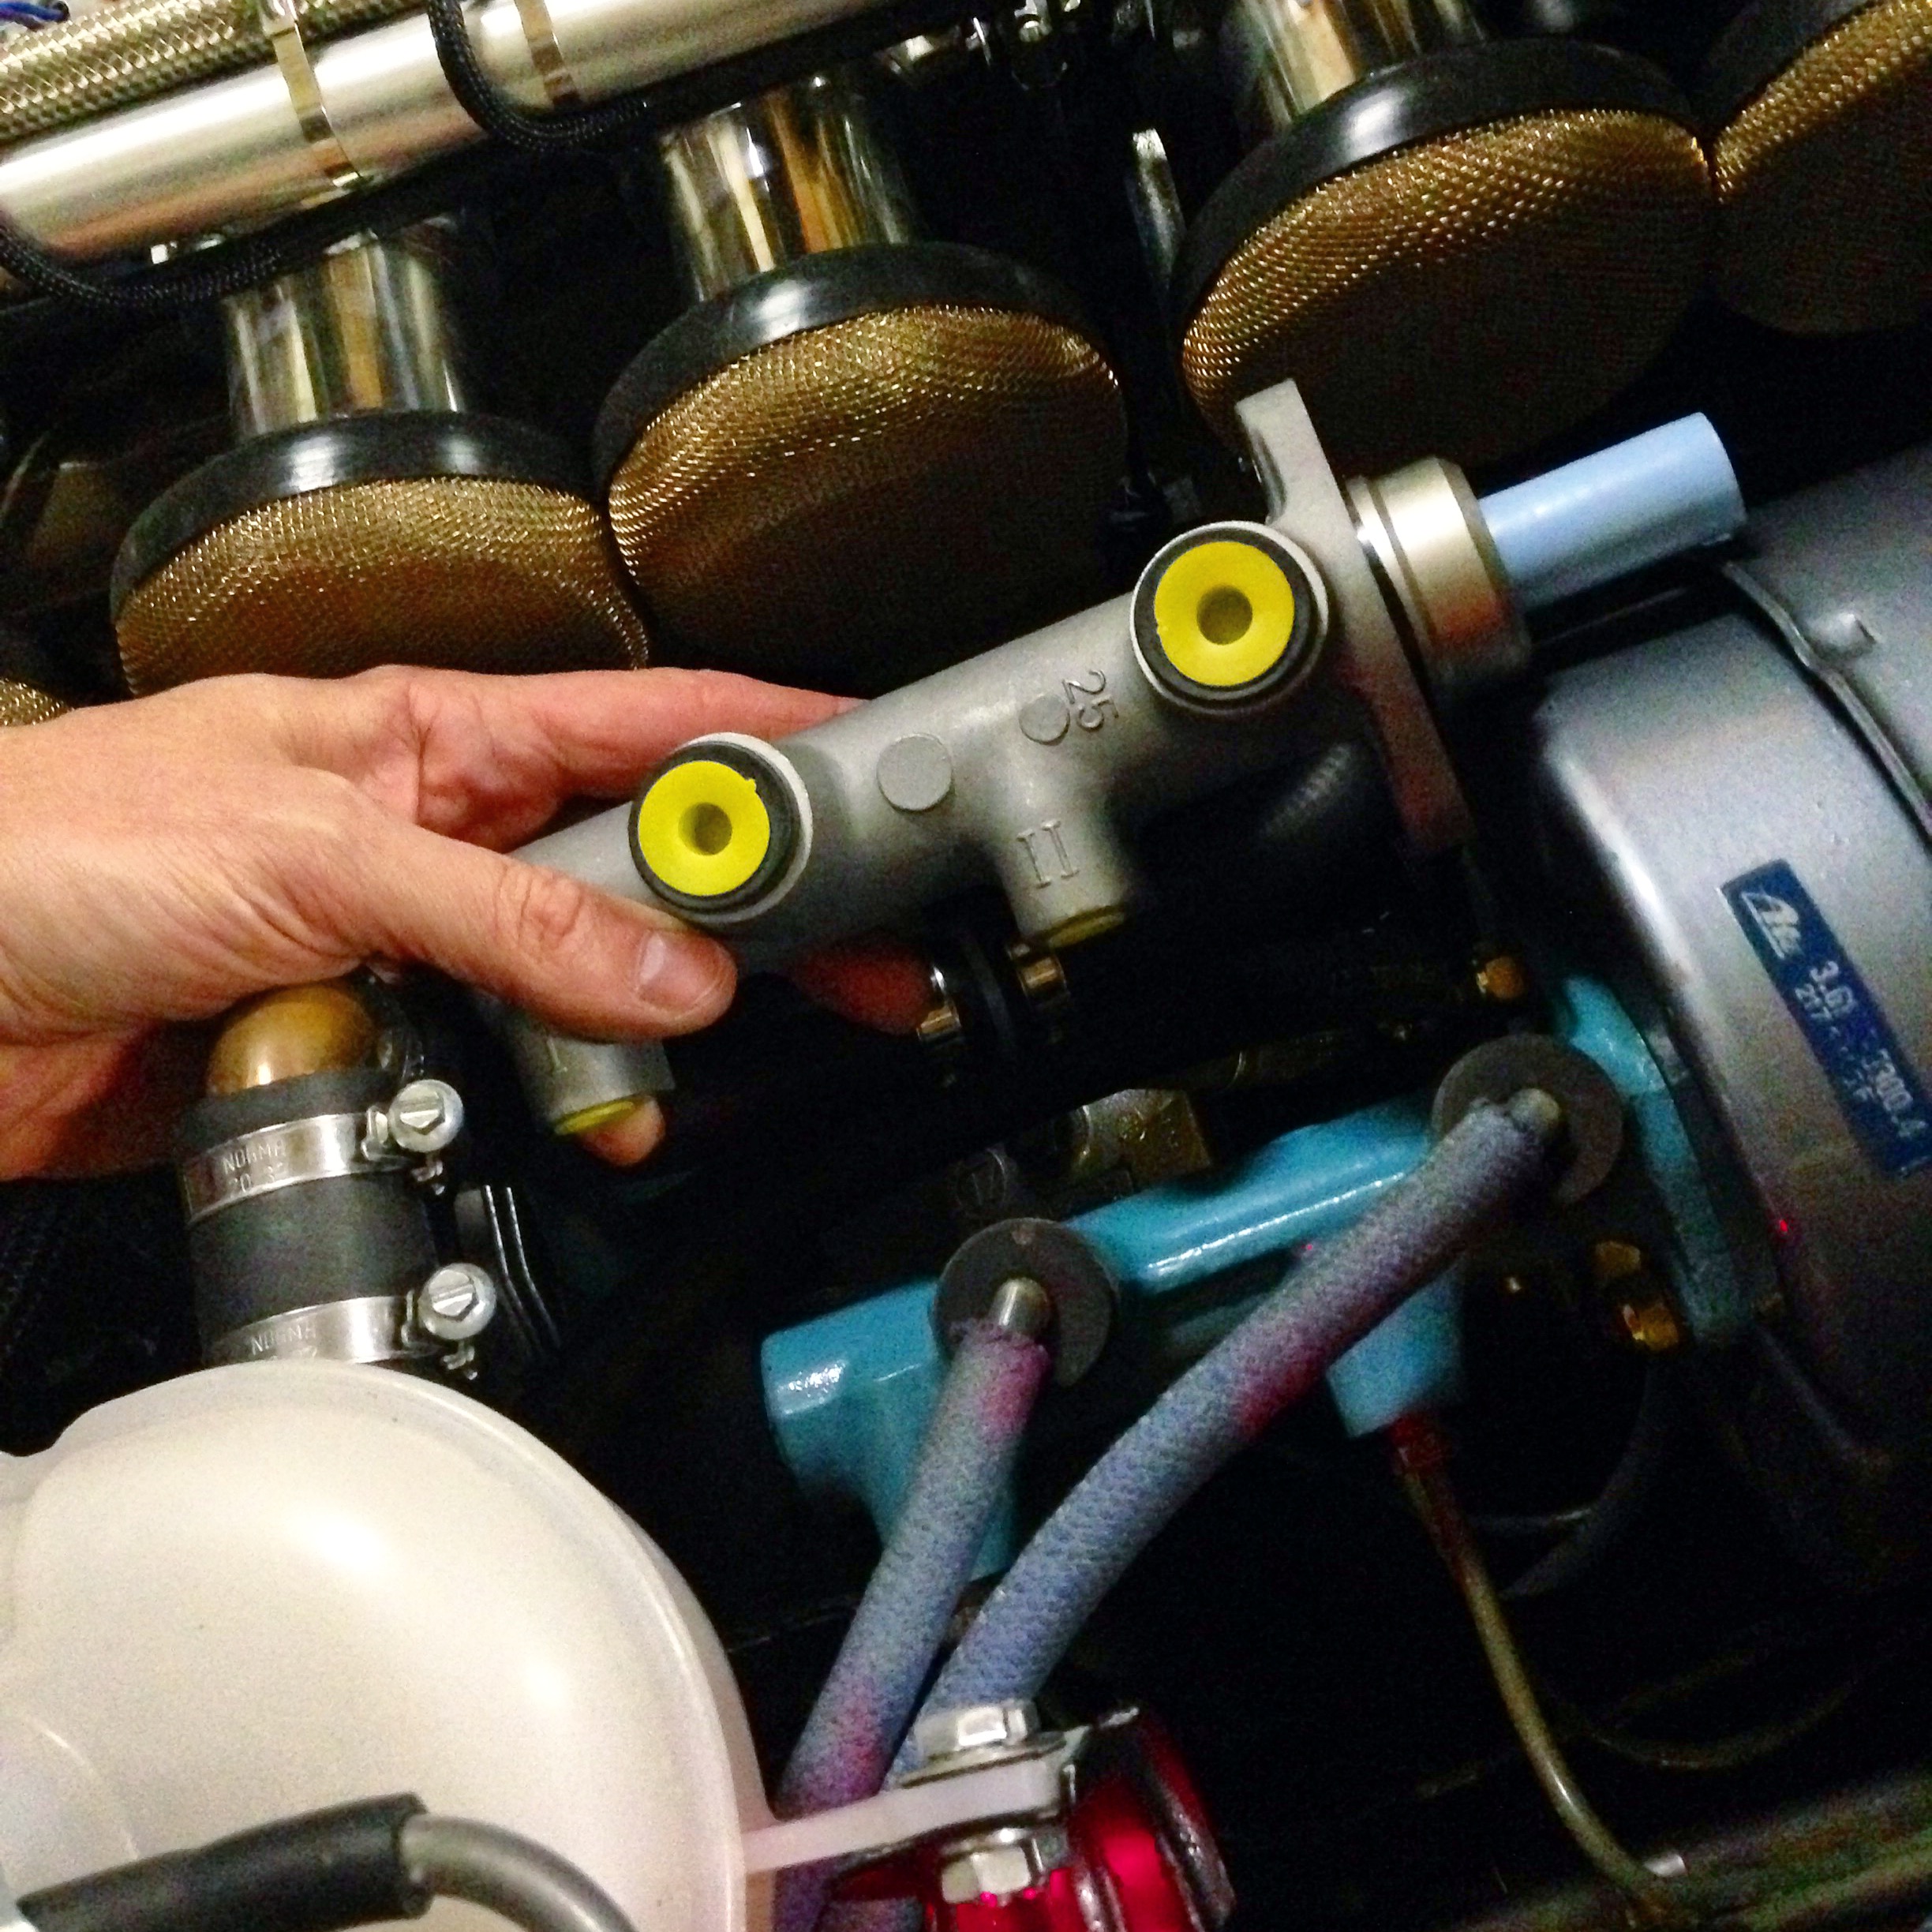
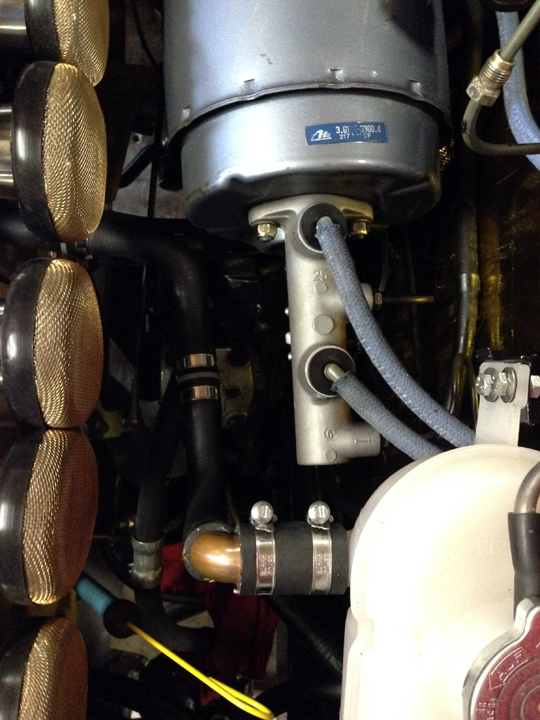
Booster delete.
So i’ve spent a tremendous amount of time and money on the stopping ability of the car forever chasing a great pedal without fail.
For a little reminder, I completely rebuilt the calipers, installed a tii booster, rebuilt my factory ATE Master Cylinder, Installed a E32 Master Cylinder, and then on to Wilwood calipers. Ultimately each iteration above was trial and error, sure they worked but not for me. I wanted the car to feel like it put you thru the windshield not like i had wooden shoes.
My latest attempt at personal perfection, a fully manual setup which meant a booster delete and smaller dedicated master cylinder. honestly the idea made sense, I lost a fair volume of vacuum by going with the ITBs. Even with the additional reservoir for vacuum could I potentially point the finger there for my poor pedal? perhaps. After a fair amount of research i found it had be done, and fairly common.
There are a few off the shelf options for the e30 chassis in europe, a few ebay jams, and one or two DIY avenues. I was leaning heavily toward the DIY side, then i ran across Chase Bays. They offer many clean components for mostly the JDM, BUT they offer nearly the same support for a few BMW chassis’s. A complete booster delete setup for e30 and e28 cars can be had for a modest price. I reached out to Chase M. direct and he was extremely helpful and won my business, i went with his full Brake Booster Eliminator and the Clutch adapter and Proportioning valve bracketry.
I opted to get the 7/8″ master cylinder from wilwood direct as i wanted the full kit with different reservoir sizes. (though it’s the same as he offers). I spoke to wilwood at great length as well, and believe this to be great option. I did have to DIY a few bits and put my own swing on things.
- I added a 3/8″ Banjo with bleeder nipple to the master cylinder.
- I made all new hardlines.
- Implemented the Wilwood 10mm bubble flare proportioning valve for rear bias.
- Added new Clutch cylinder and Slave cylinder
- Made a new pedal linkage for correct geometry
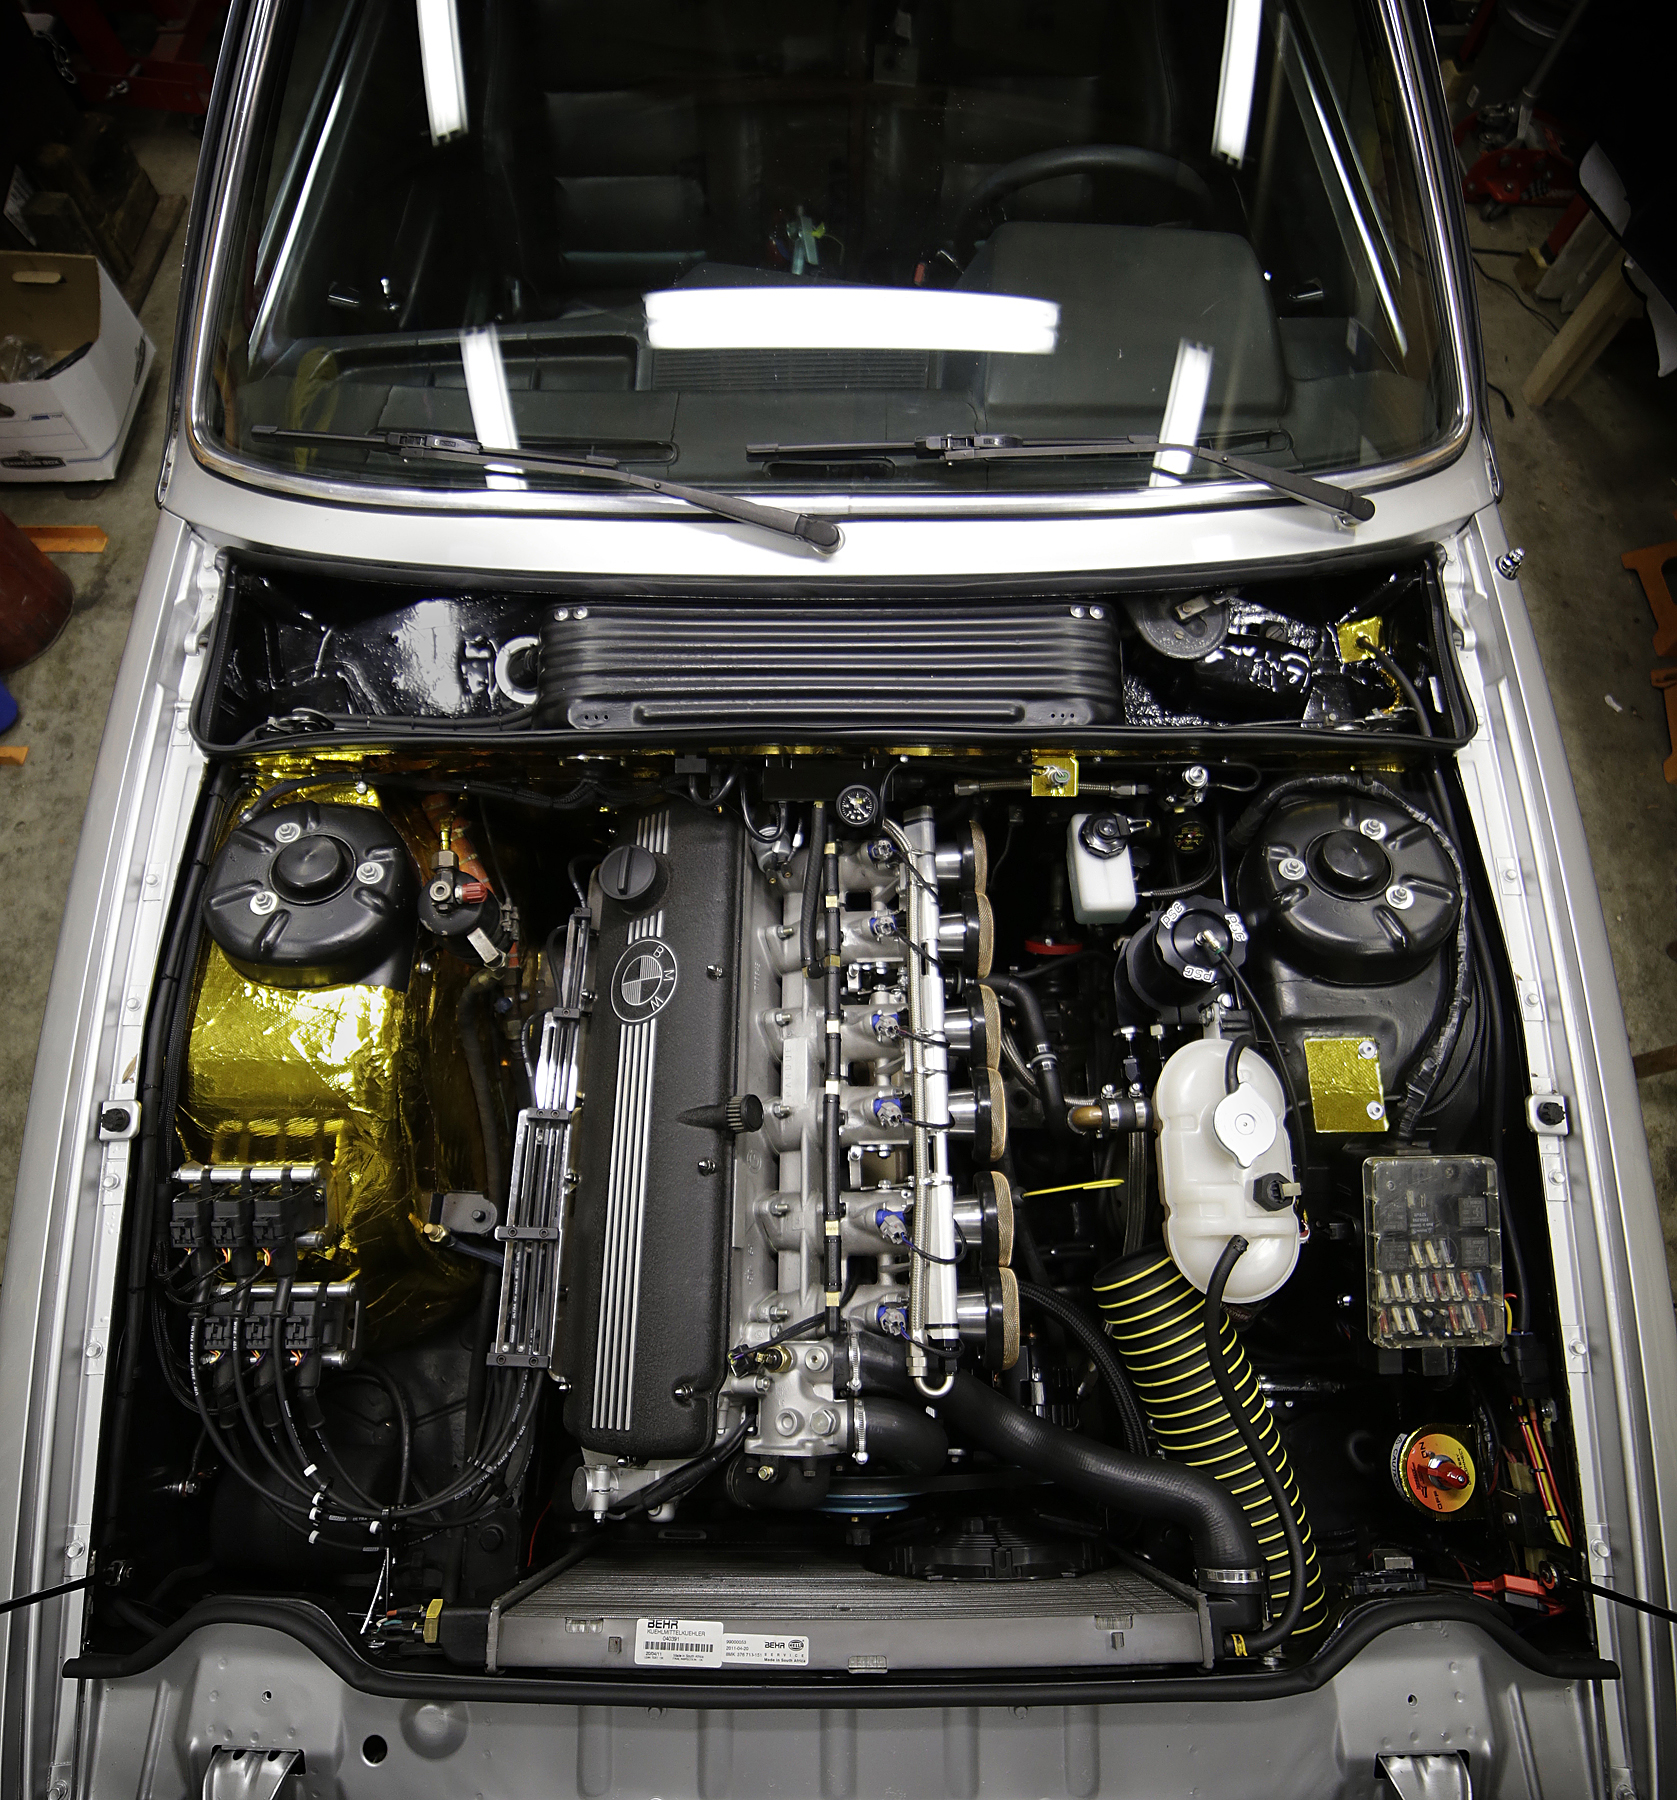
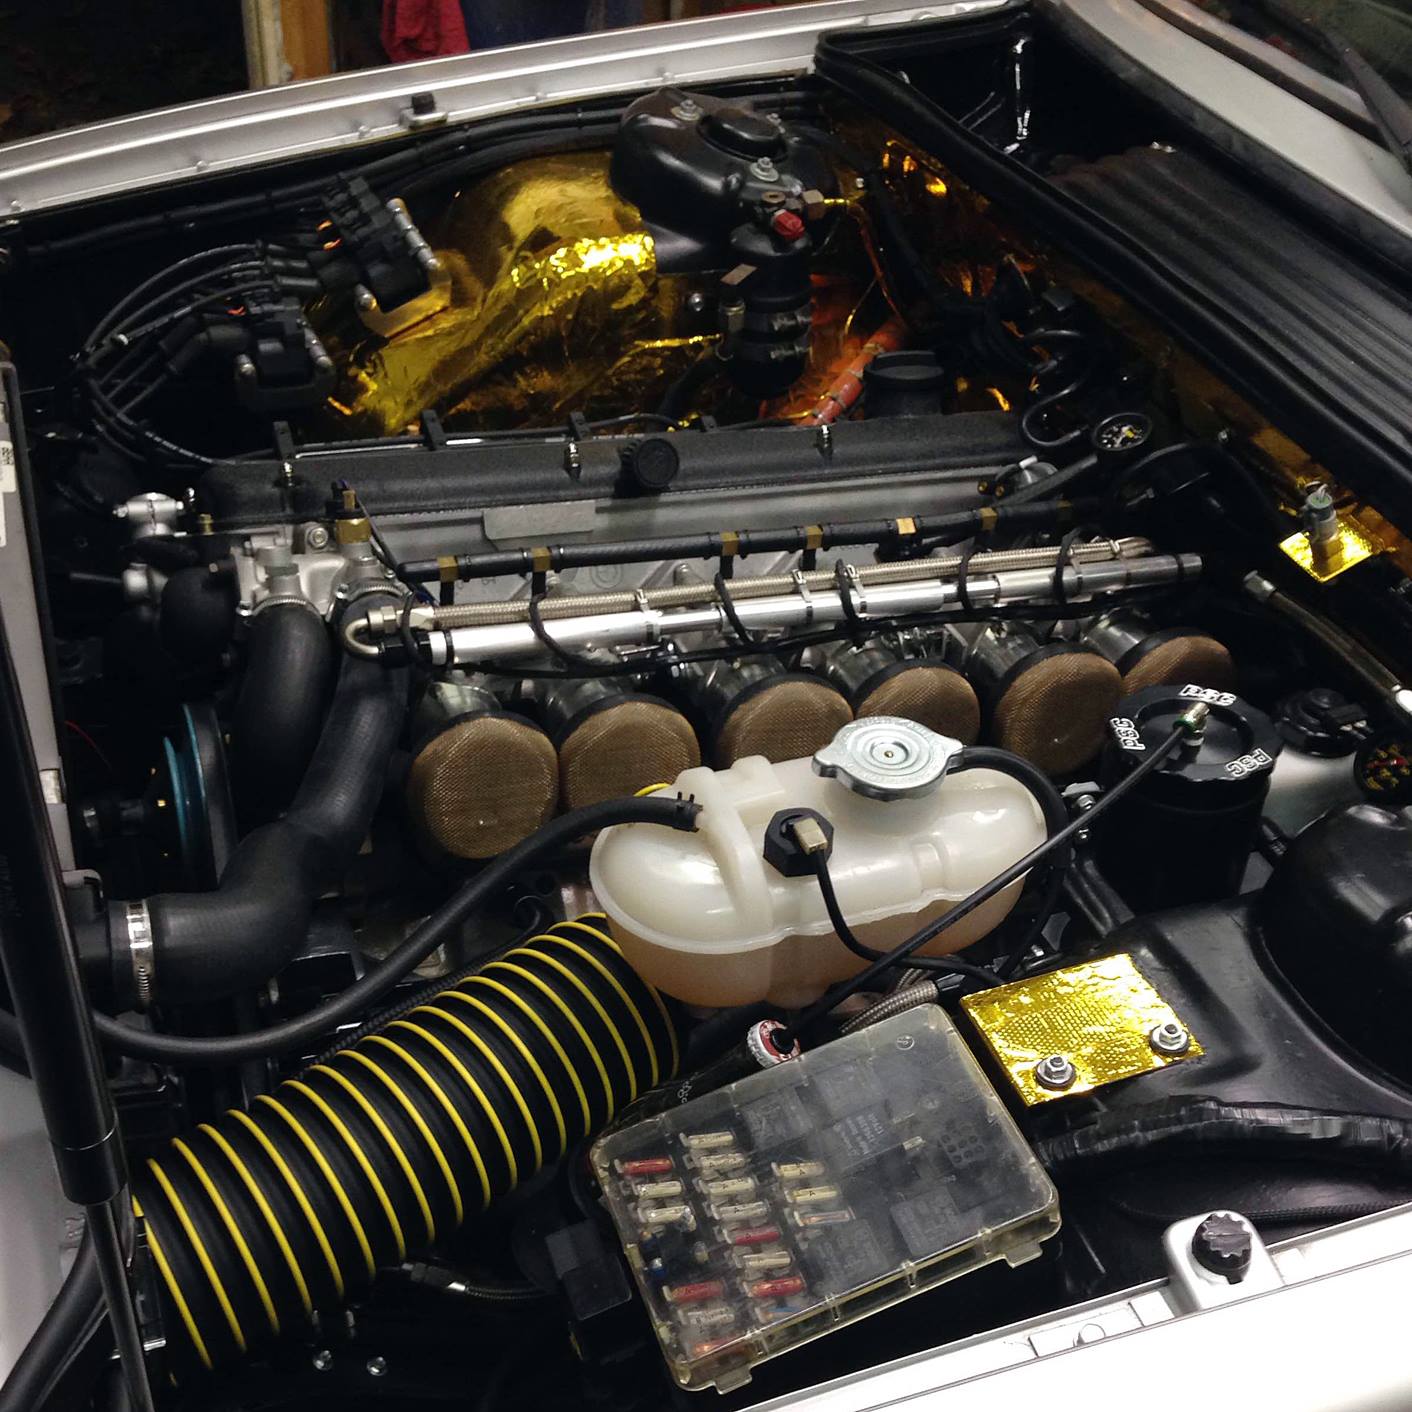
another benefit here the clean bay, and with no booster i can likely go with longer trumpets for the sidedraft.
Below are the pics:


final before/after

Fresh air.
while i’m relocating the battery i decided to try forced fresh air to engine bay to see if there are any clear benefits, the drivers high beam is perfect and has a clear shot for sidedraft, i’ll be adding some duct work and perhaps removing the passenger side high beam as well. i went with store bought funnel which fit the OE rings and mount but i did need to modify the bulb cups. the screen is readily available for motorcycle light protection, the factory bmw bulb is 5.75″

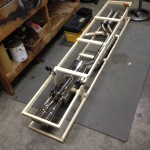
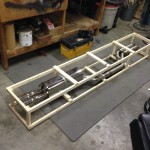
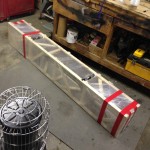
solid mount shifter
since going with poly bushings all the way around and having a 265 5spd in the car. i modified the factory crossmember and added provision for a second mount. while in there i created a solid mount shifter conversion. the conversion uses a factory cup and mounts it directly to chassis for cleaner and rigid shift. ill post more pics shortly.
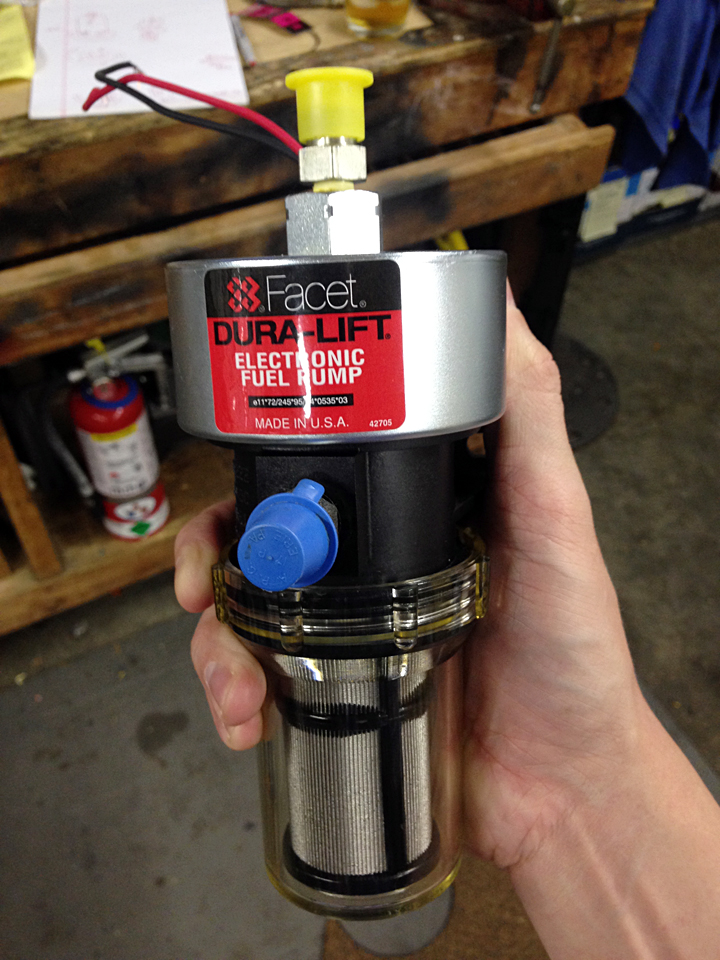
swirl pot and new fuel pump
during the vintage rallies and on few occasion outside of the event, i came to the conclusion of the bosch 044 being grossly overworked. my setup had the bosch in the OE location, one would think an inline external pump could replace a inline external pump. unfortunately that was not the case. the 044 had been working fine but started to fail, by just stopping after working for awhile. the pump did its job on safety and designed to stop when it gets too hot, but leaving me sitting while it had to cool. the 044 was never intended to be used as a puller but rather a pusher. not to mention it was puller the fuel up and out before pushing to the engine, its needs to be fed not feed itself.
my solution was to add a lift pump, and swirl pot. the lift pump i used is the facet dura-lift, its mainly used in farming or diesel applications, but it’s a great unit: 12v, flows 33 gallons per hour and has 120″ dry lift. its self priming, filtered, and has an internal check valve all for under $100!
this pump is lifting the fuel from my factory tank and loading a swirl pot. the swirl pot has around a gallon capacity and doubles as a return res, fuel cooling and gravity feed for the 044 bosch which is mounted below.. i also replaced the 044 with a brand new one.
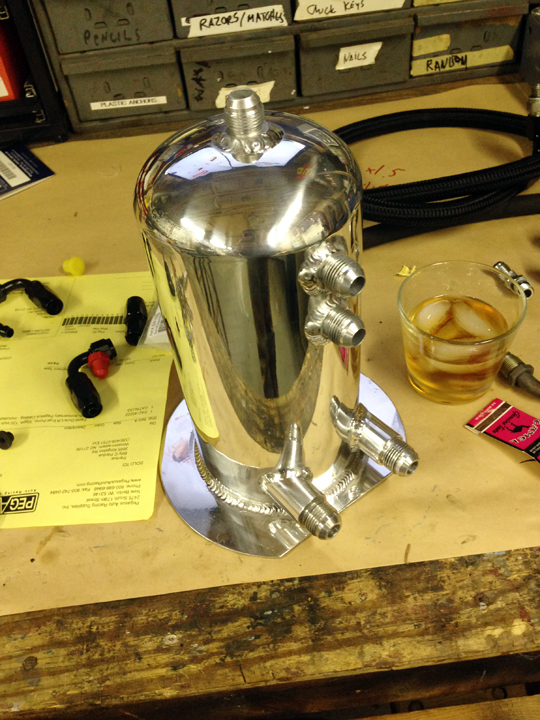
the install wasn’t the most pleasant task, honestly was a pretty tall order.. i used mercedes benz fuel pump isolating mounts and ss nylon braided line thru out. though ill likely go with teflon to fight the odor.


i’m happy to report no failures since this install.

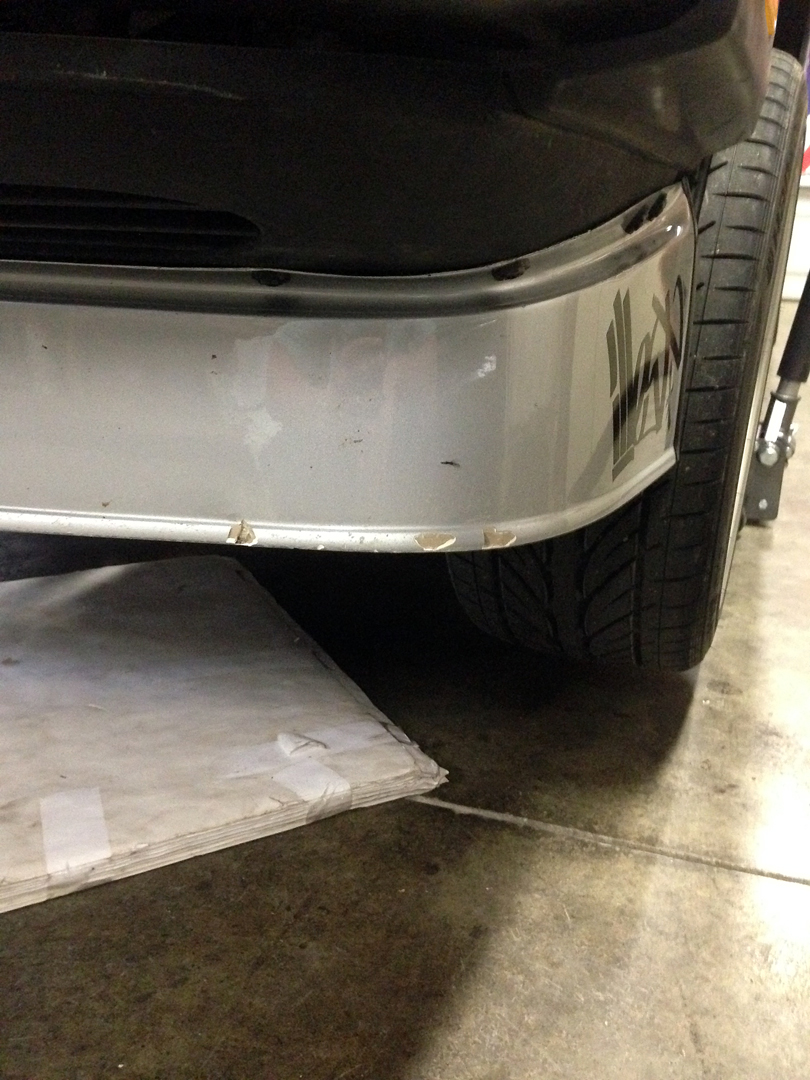
carnage.
the vintage rally wasnt entirely without incident. i miss judged the depth of some gravel mountain roads and the lip turned into a shovel. spiderwebbed the side too.
Action Shots.
there were a few guys snapping pics for the vintage event. heres a few from our rallys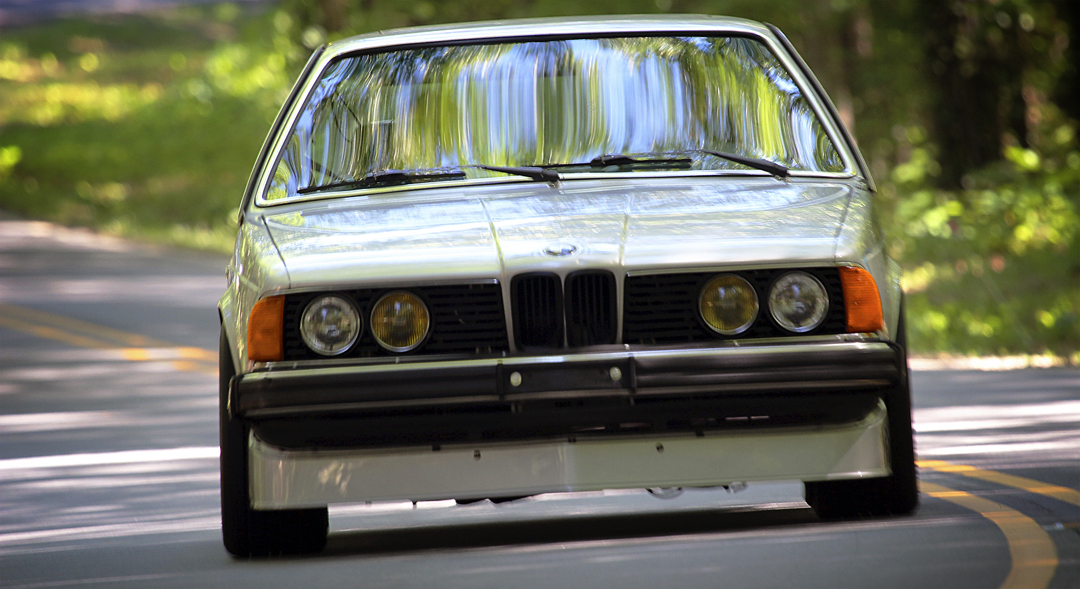
cinco de dyno
after all the street and remote tuning it was finally time. i’m happy to report:
- 270.6 whp at 6200
- 210 ftlbs
overall i’m pleased with 270rwhp, here we have just reg old pump gas.. 93 with ethanol. my target was to clear 250 and 300 was a goal. i think the 300 is doable. i had some heat soak on all the later pulls after tuned. once cool the numbers would go back up..
also the harmonics on the trumpets with length i have gave me some reverberations up top seen in the map.. im certain with longer runners, no filter elements and some sort of heat protection ill make a fair amount more but i wanted a real world number that was true to my drivable setup..
it hit and held max tq at 2100rpm all the way thru.
with a 20% driveline loss thats a net of 338hp at crank. 318hp is 15% is used.


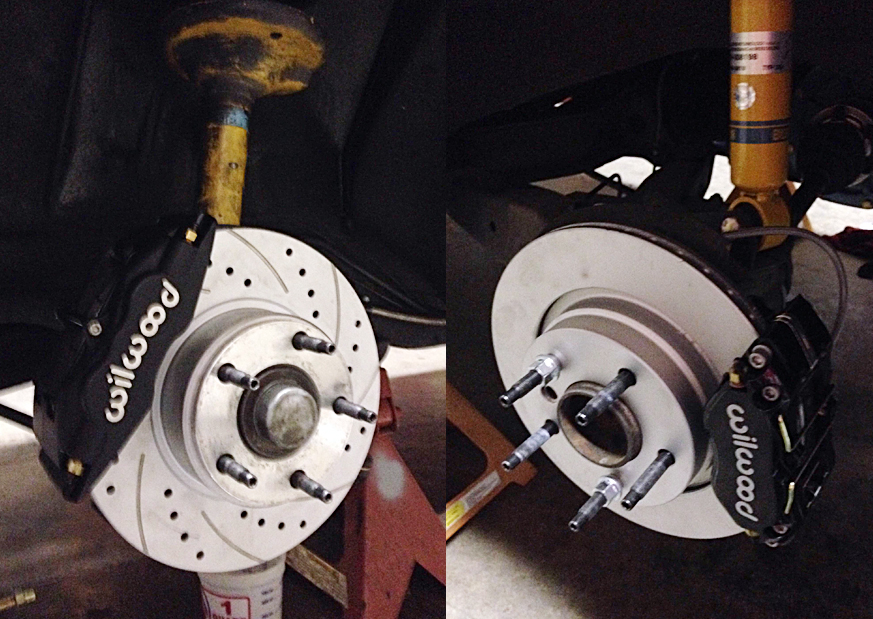
Wilwoods
i know i know. after all that work on rebuilding the factory ATEs. they were nice but thats an old setup and i need sometime to stop this pig…went with the Dynalite 4pot rears @ 295mm and for the front the Superlites @ 300mm. Ireland sells a kit for the e12 and that fit perfectly.
the rotors did require some attention on the retaining screw, and the directions for install were nonexistent tho not overly difficult. bleeding also takes a bit more effort, i suggest getting a pressure bleeder.


successful street tuning
pic is pretty telling, reliable and strong. ready for next steps
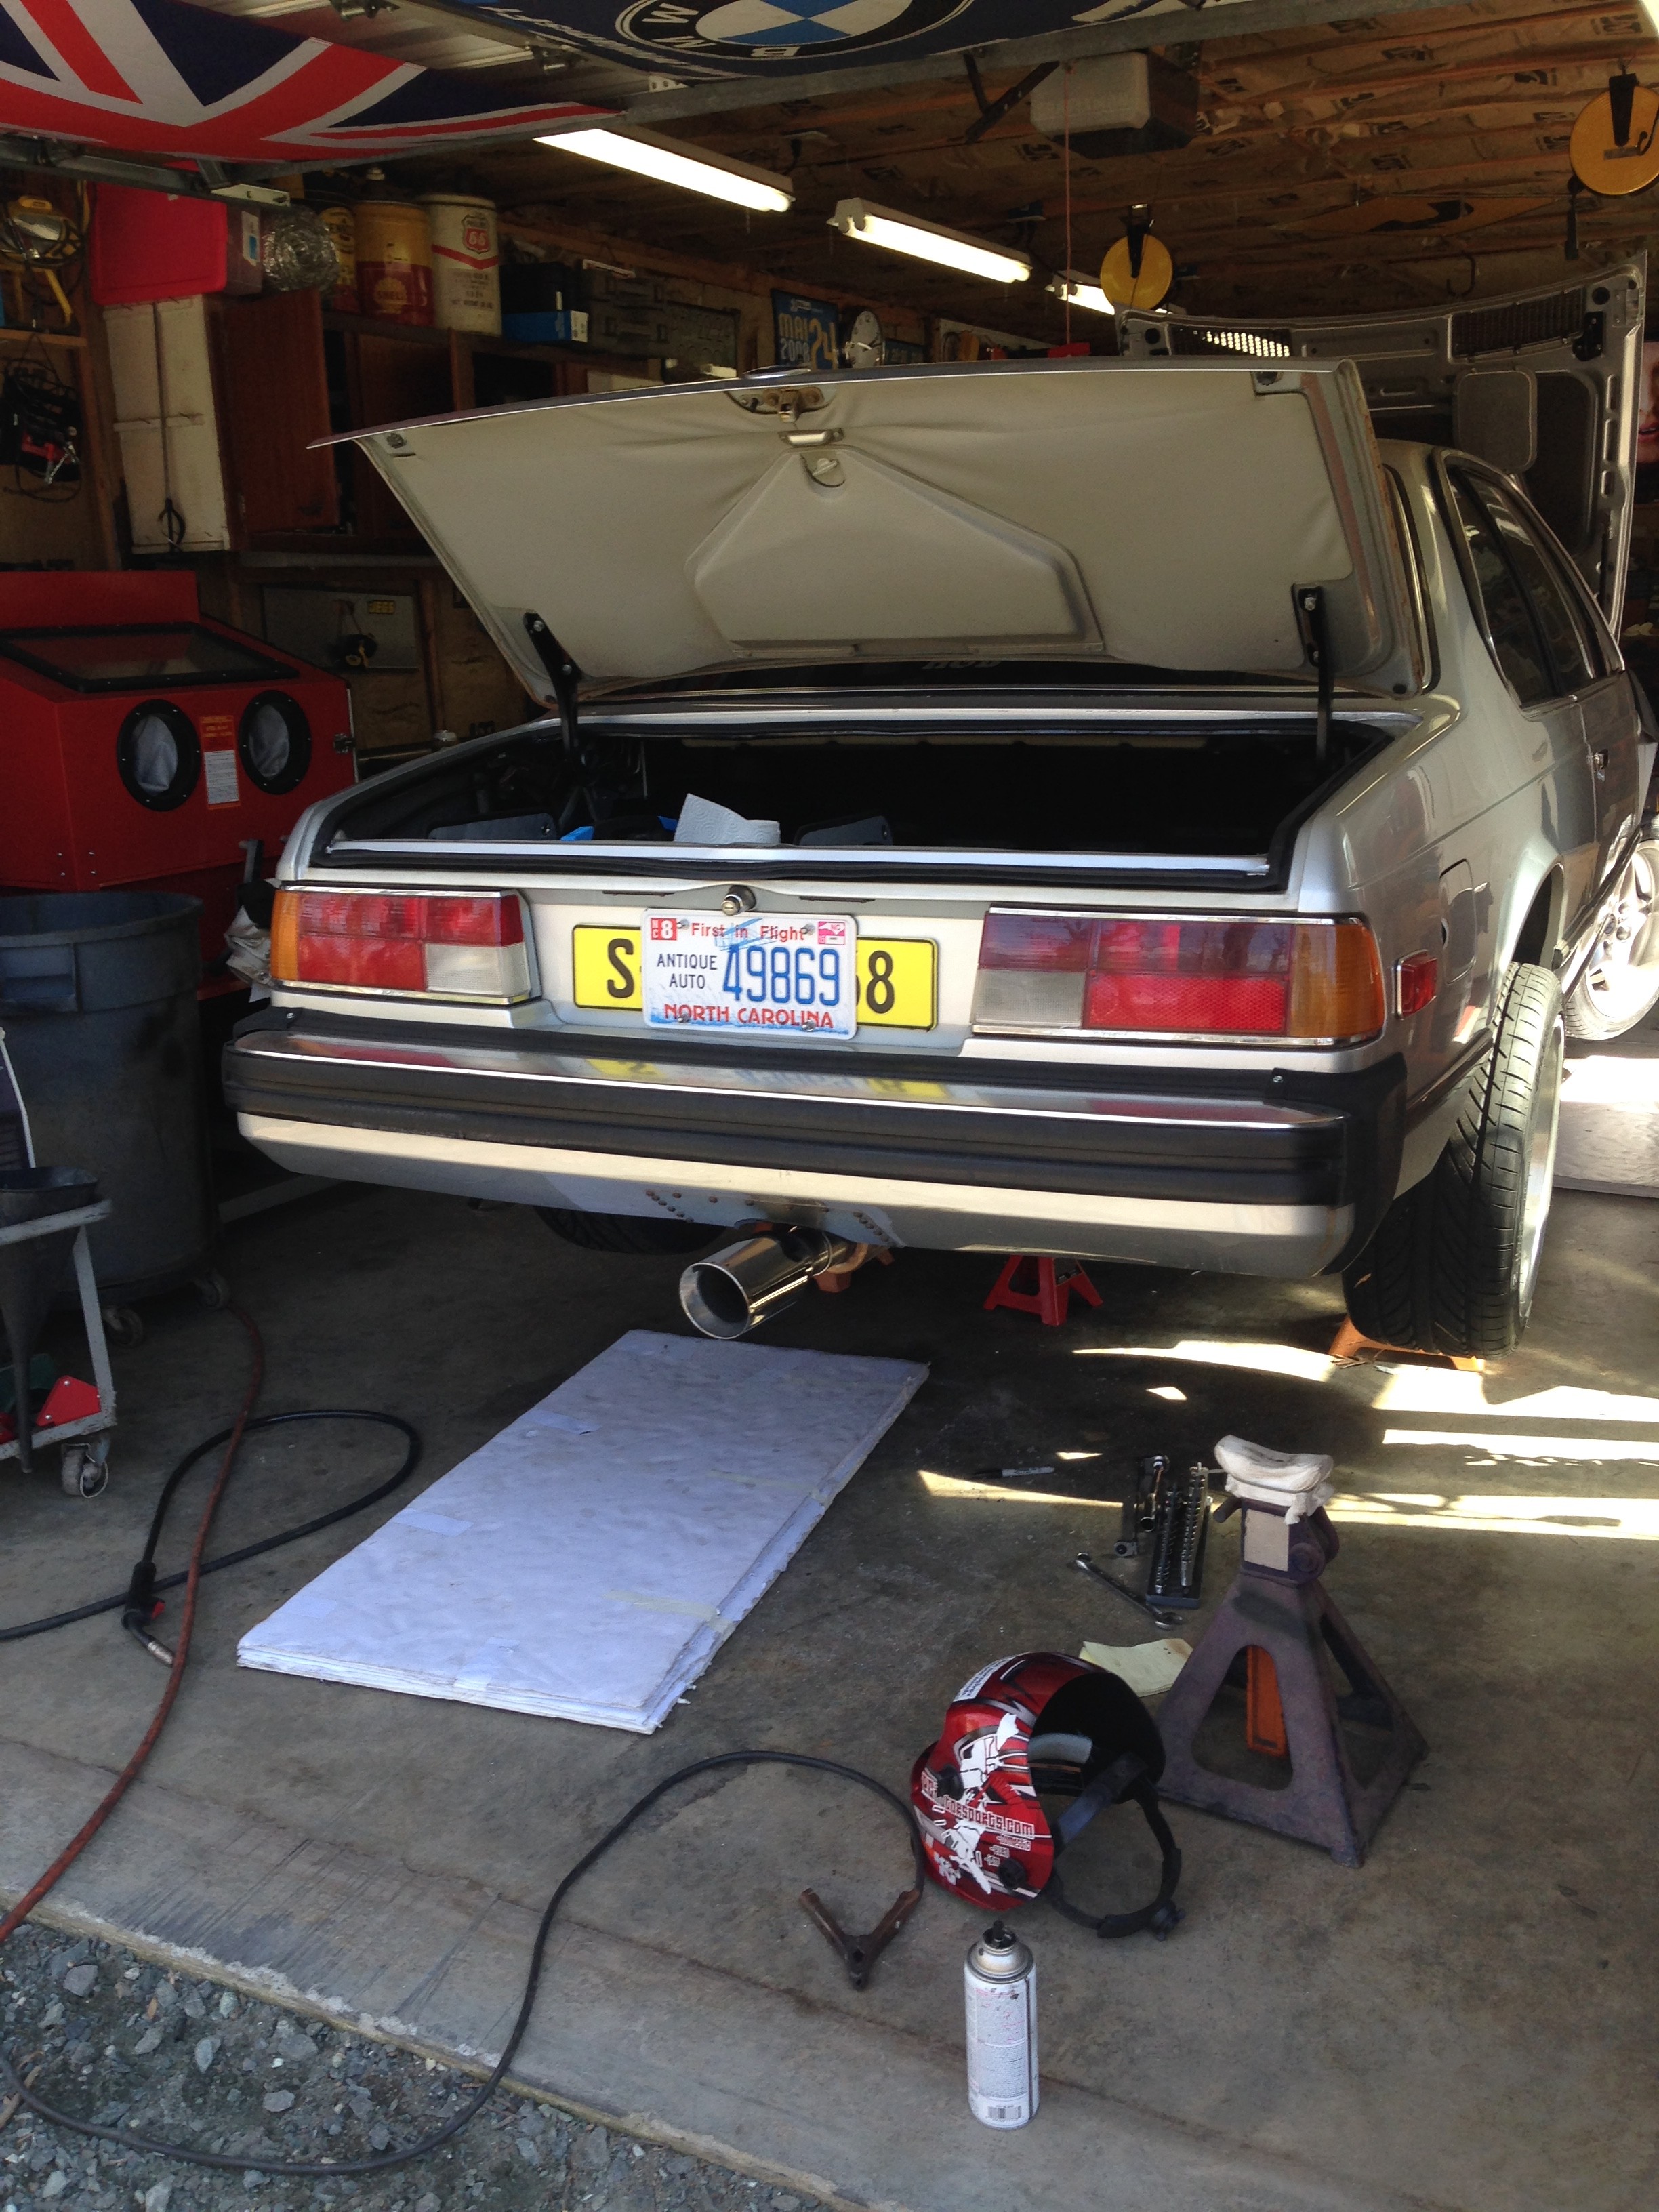
exhausted
time for a change, sold the billy boat
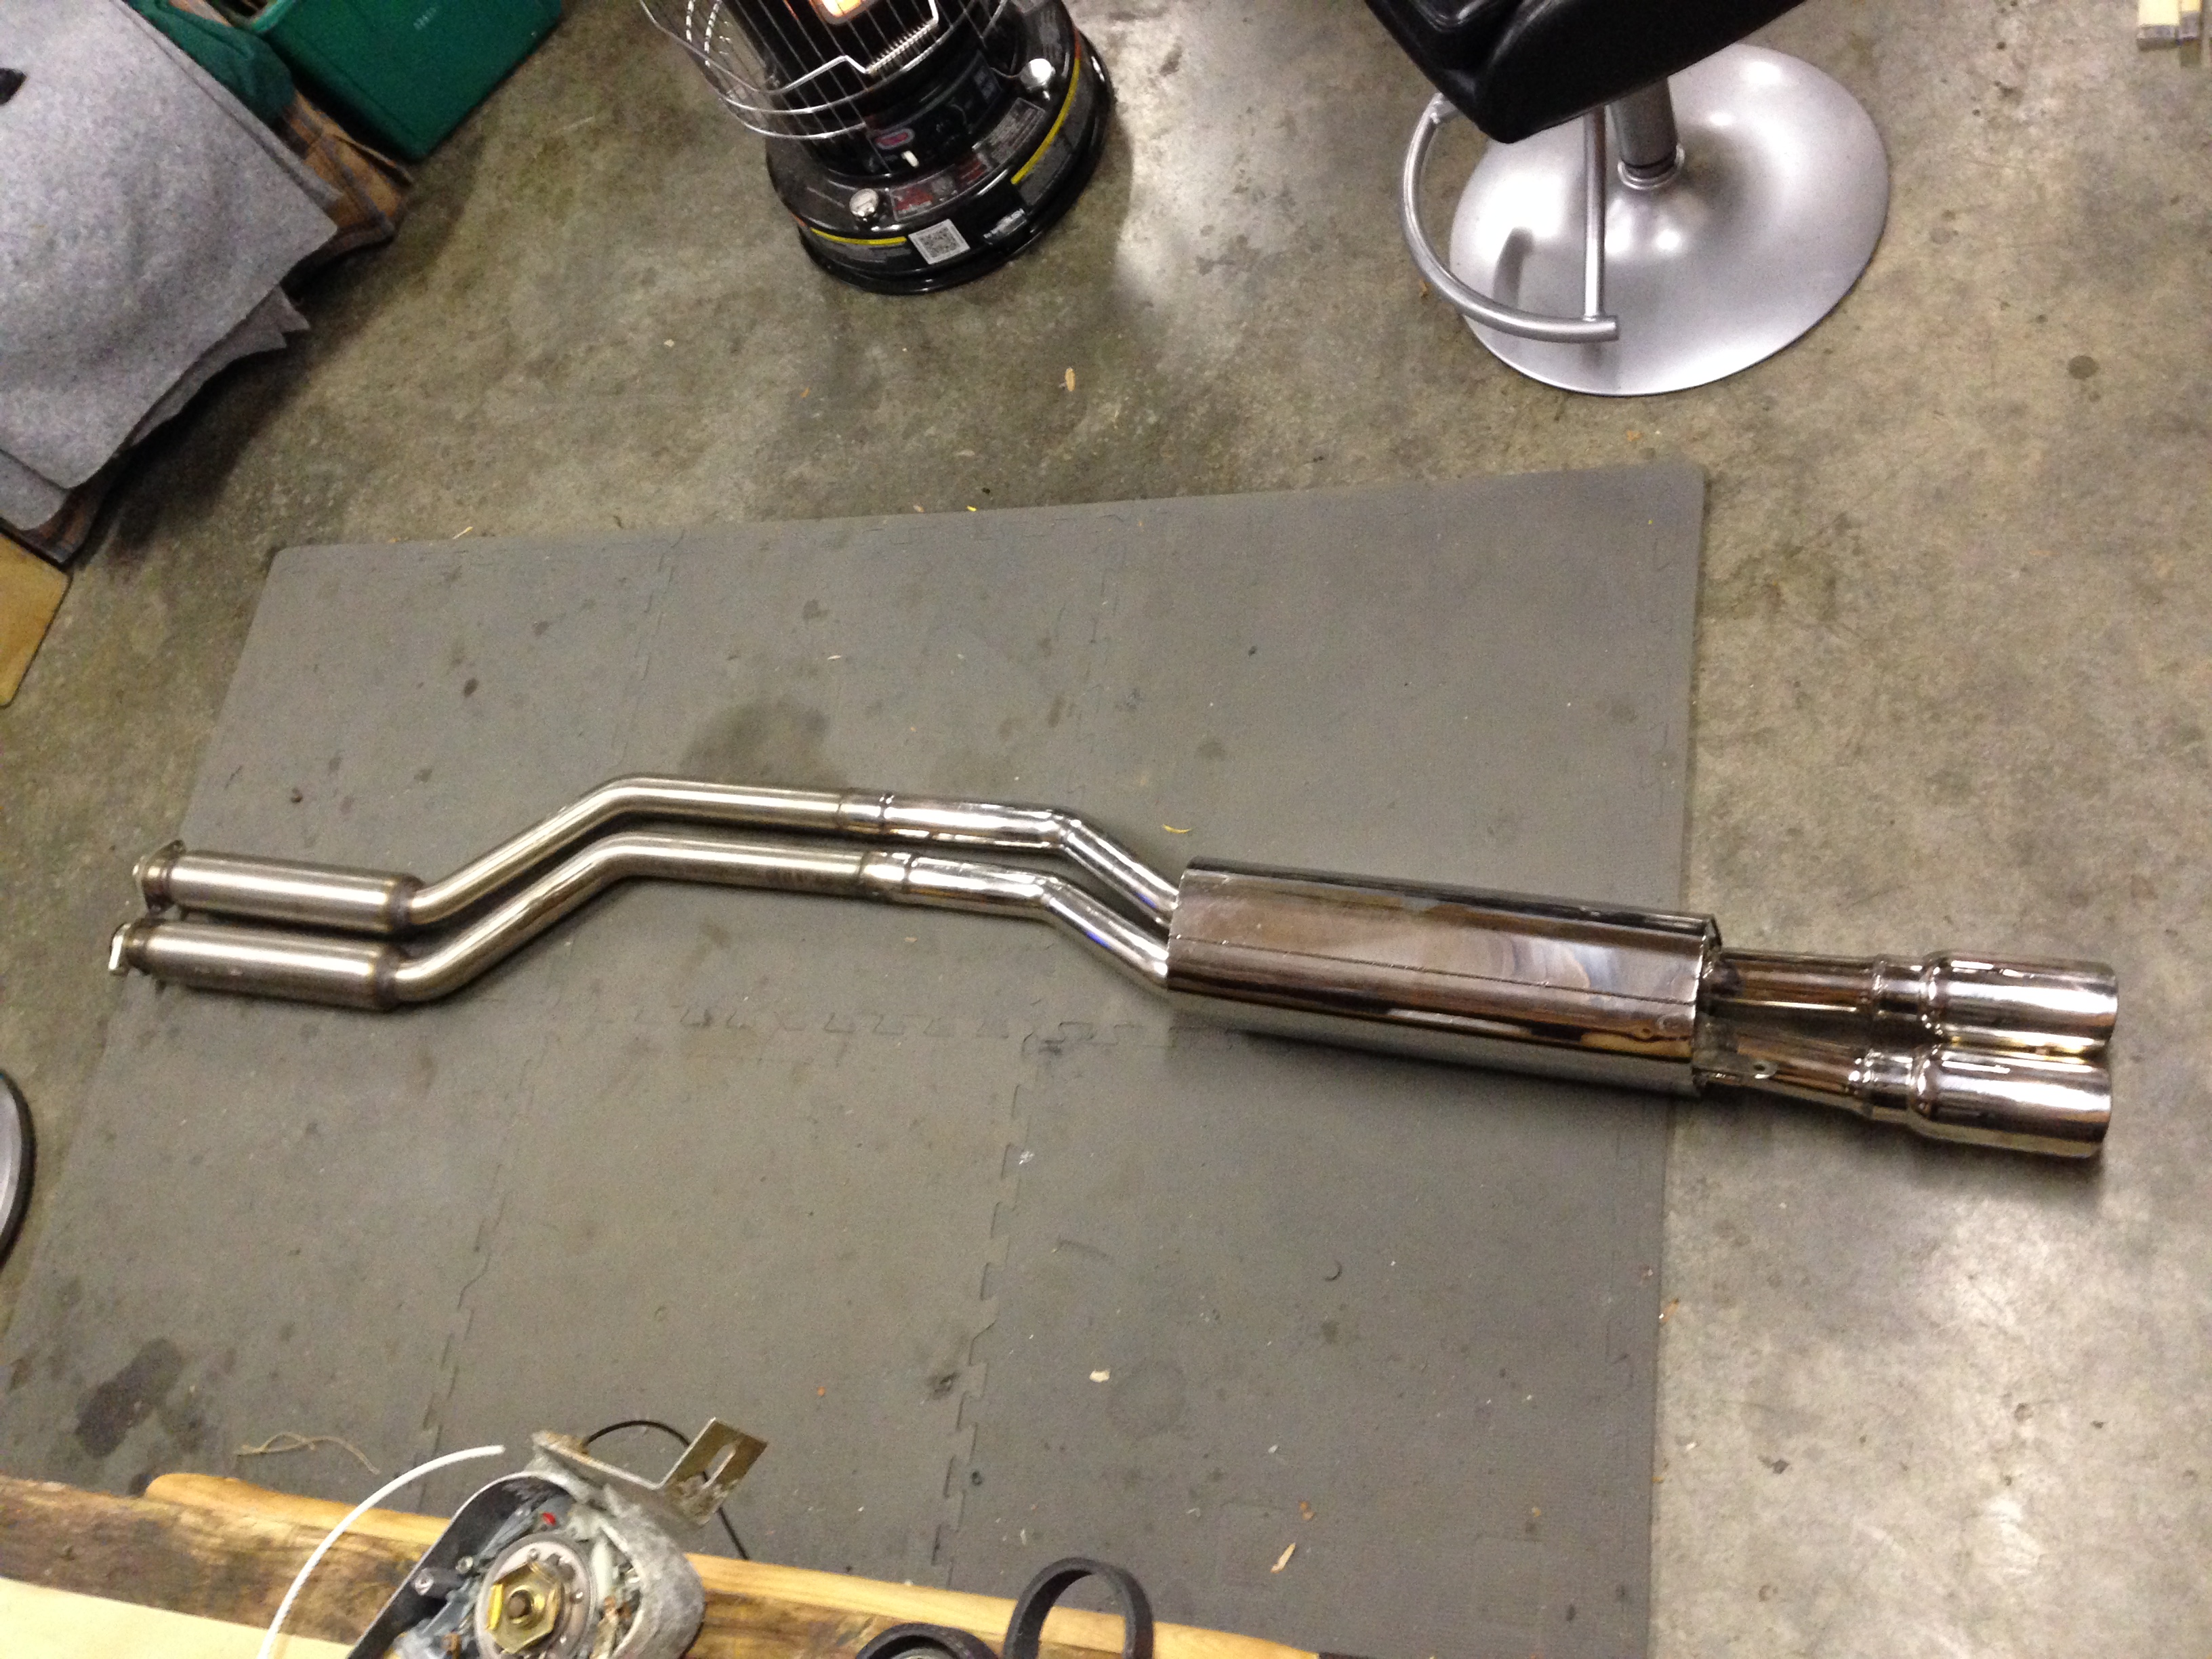

went full custom. not to bad for shadetree job.
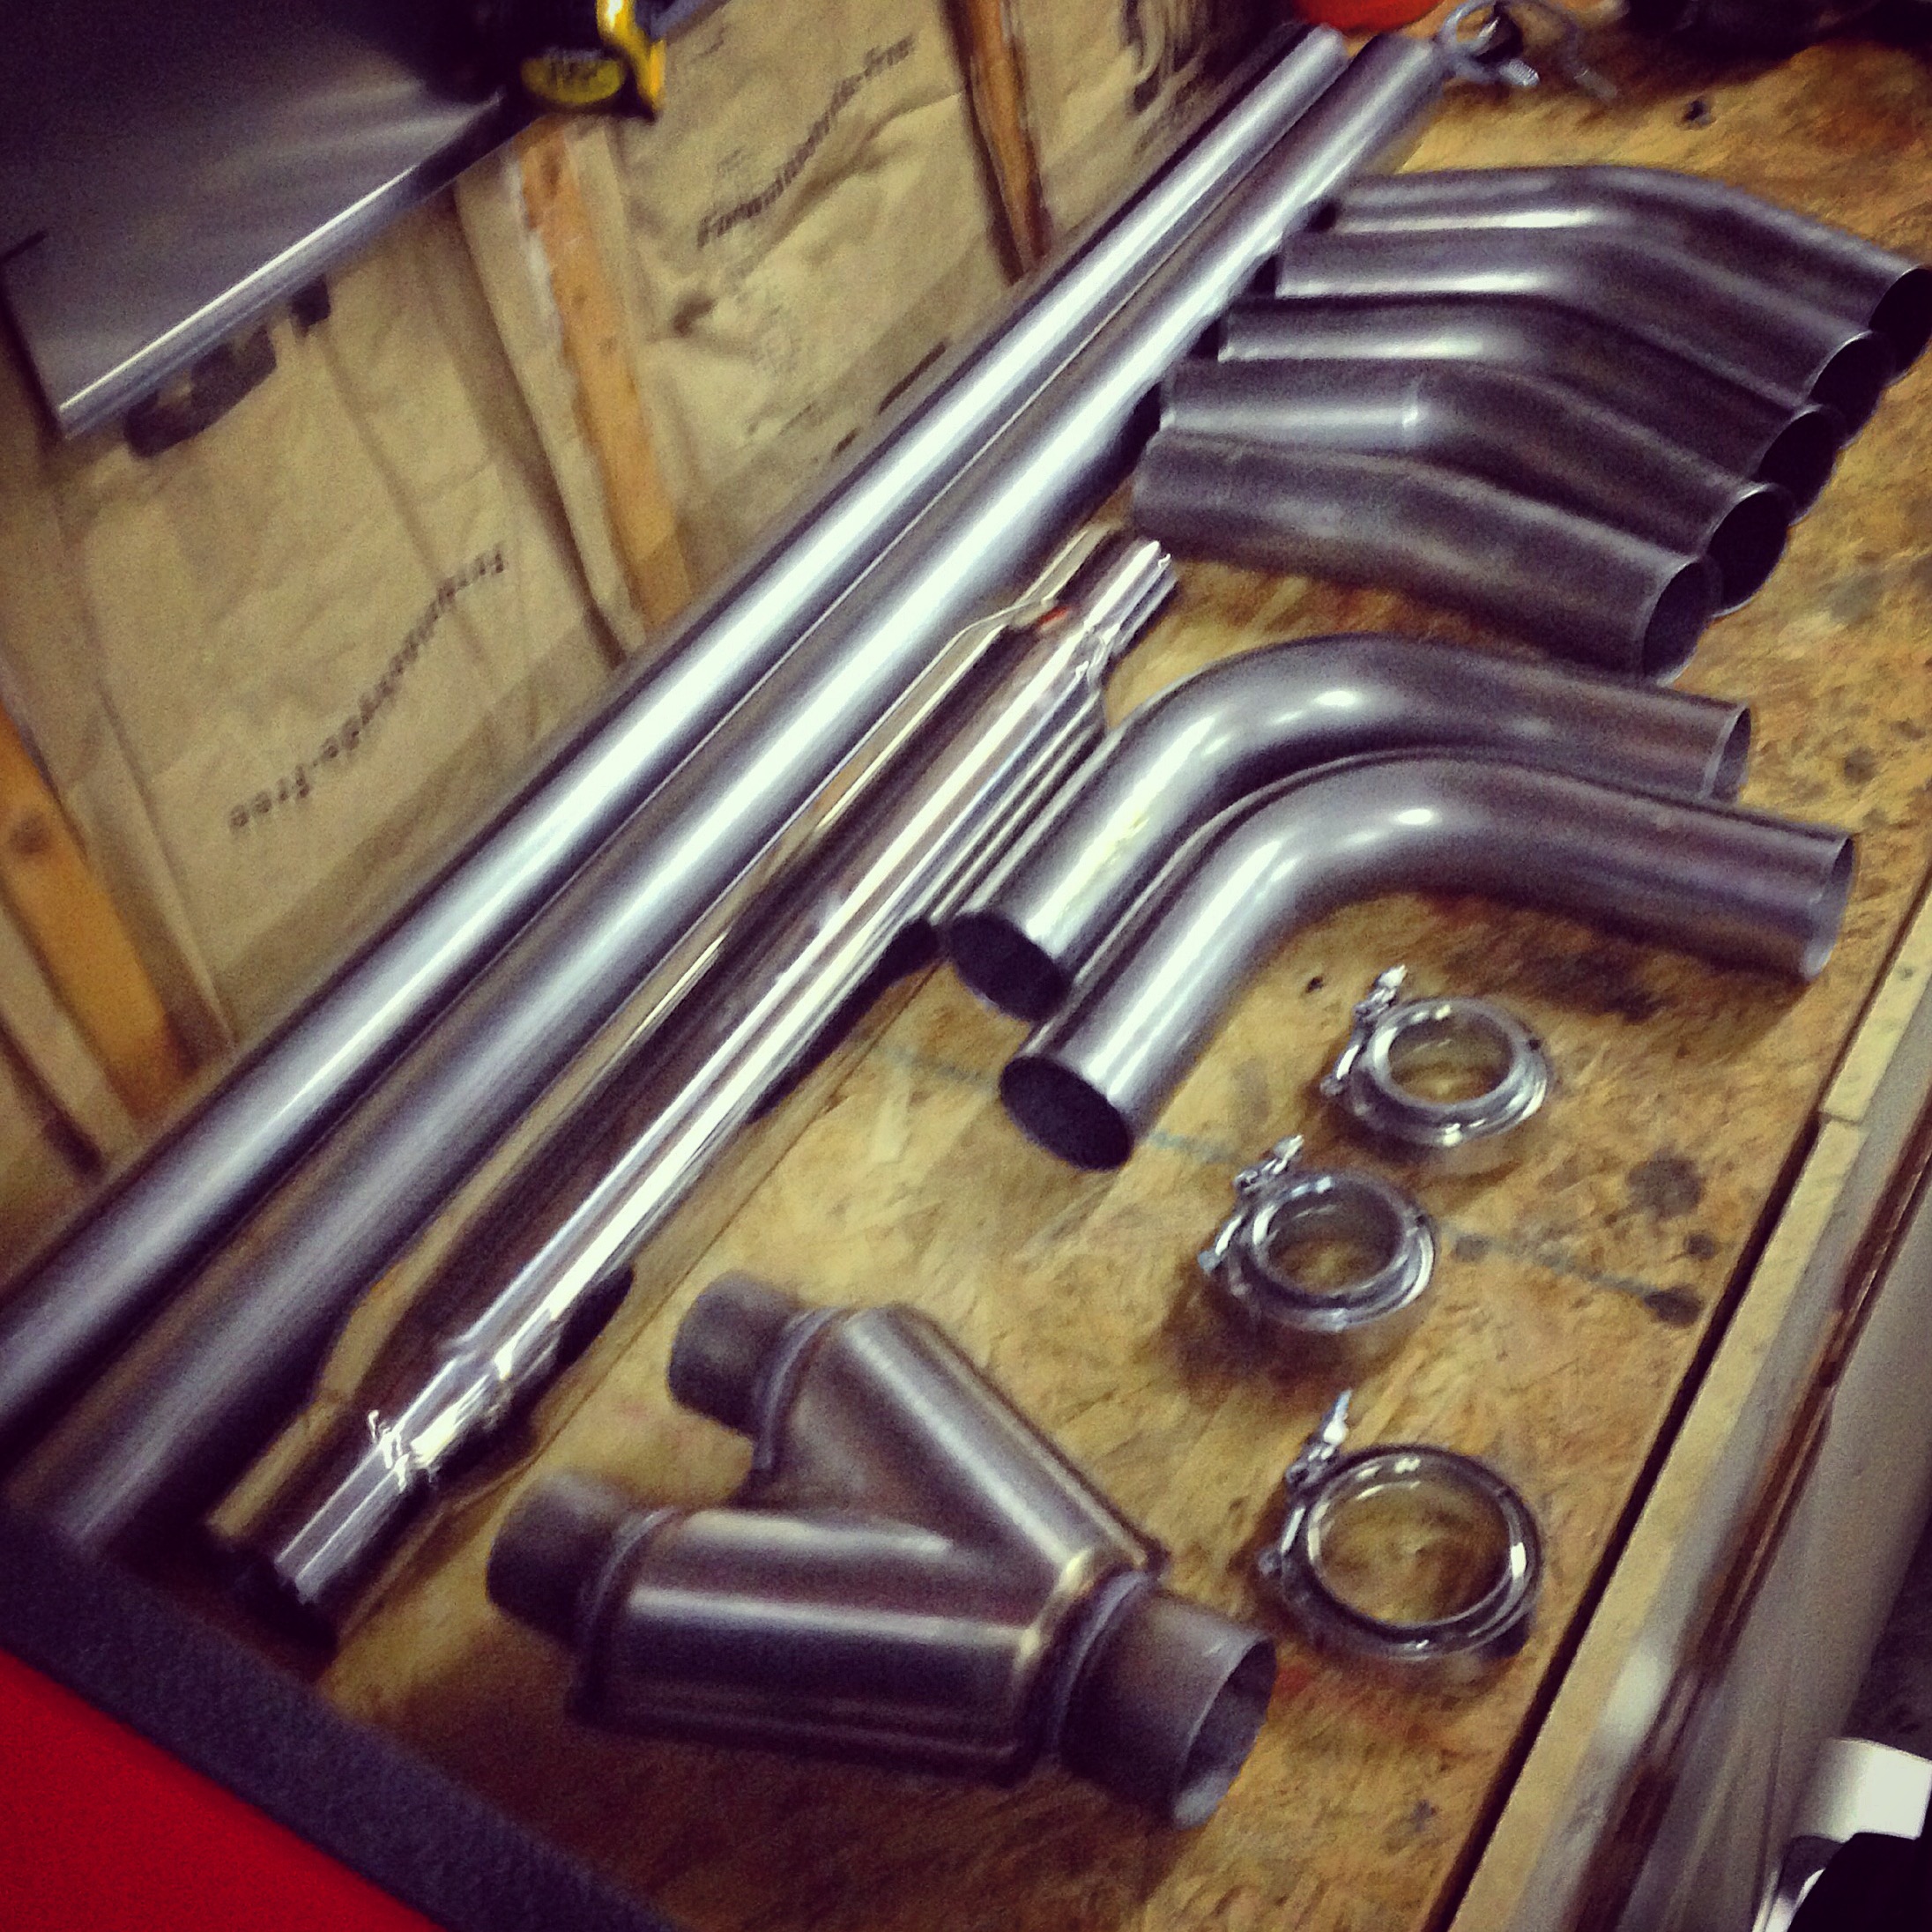


still debating the tip, i went with the angled straight cut but still the rolled tip too.
loctite the crankpulley
make sure you use loctite on those with 2-pc crank pulley and balancers. especially if you have a cold natured low idling big six with a hot cam.. or this will happen, i’m very fortunate that i caught it..


brake caliper rebuild
someday up to six years ago the brakes on the car decided to seize unbenounced to me until i was behind the wheel. the rebuild was very time consuming, with many many steps.
- you can still get the rebuild kits with a little wait.
- for the prep i used brake cleaner and gasoline, with a great deal of brushing.
- followed by a soak in evapo-rust to loosen & remove pistons. a close inspection of the pistons and channels gave me hope for a rebuild.
- i sanded the pistons with 1500 grit paper, more brushing followed
- then another soak even longer for all bits, several days.
- a cleaning in brake clean & a new soak method but this time in ATE super blue 3 days
- reassemble


